The Aetherium Wars limited-time event in Honkai: Star Rail transformed the usual exploration loop into a spirit-collecting, puzzle-solving tournament. Even though the event first appeared in patch 1.4, the Corridor of Fading Echoes remains one of the most instructive Victory Zones for players revisiting the mode in 2026 or encountering a possible rerun. This guide follows the full route through the zone, from the opening dialogue to the final showdown, with step-by-step directions for every Snowshine Lamp puzzle and practical tips for the last duel.
How To Begin the Corridor of Fading Echoes
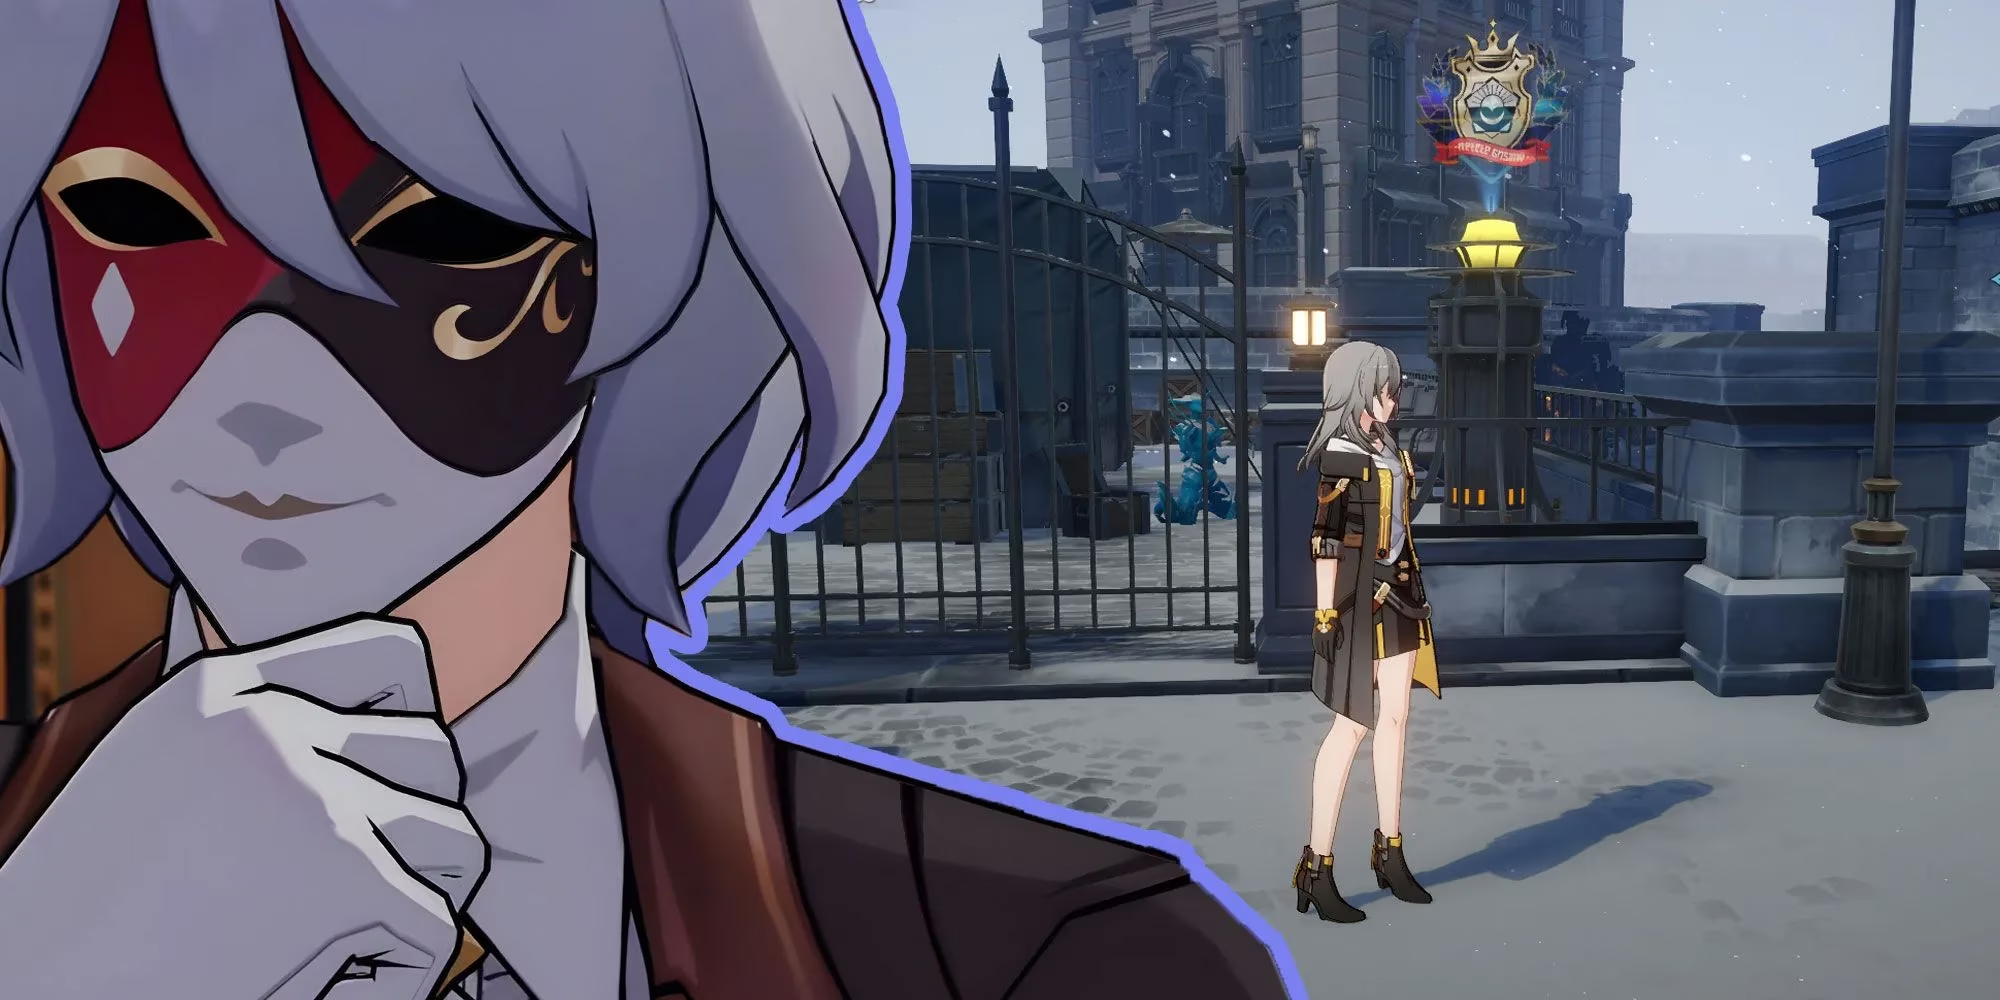
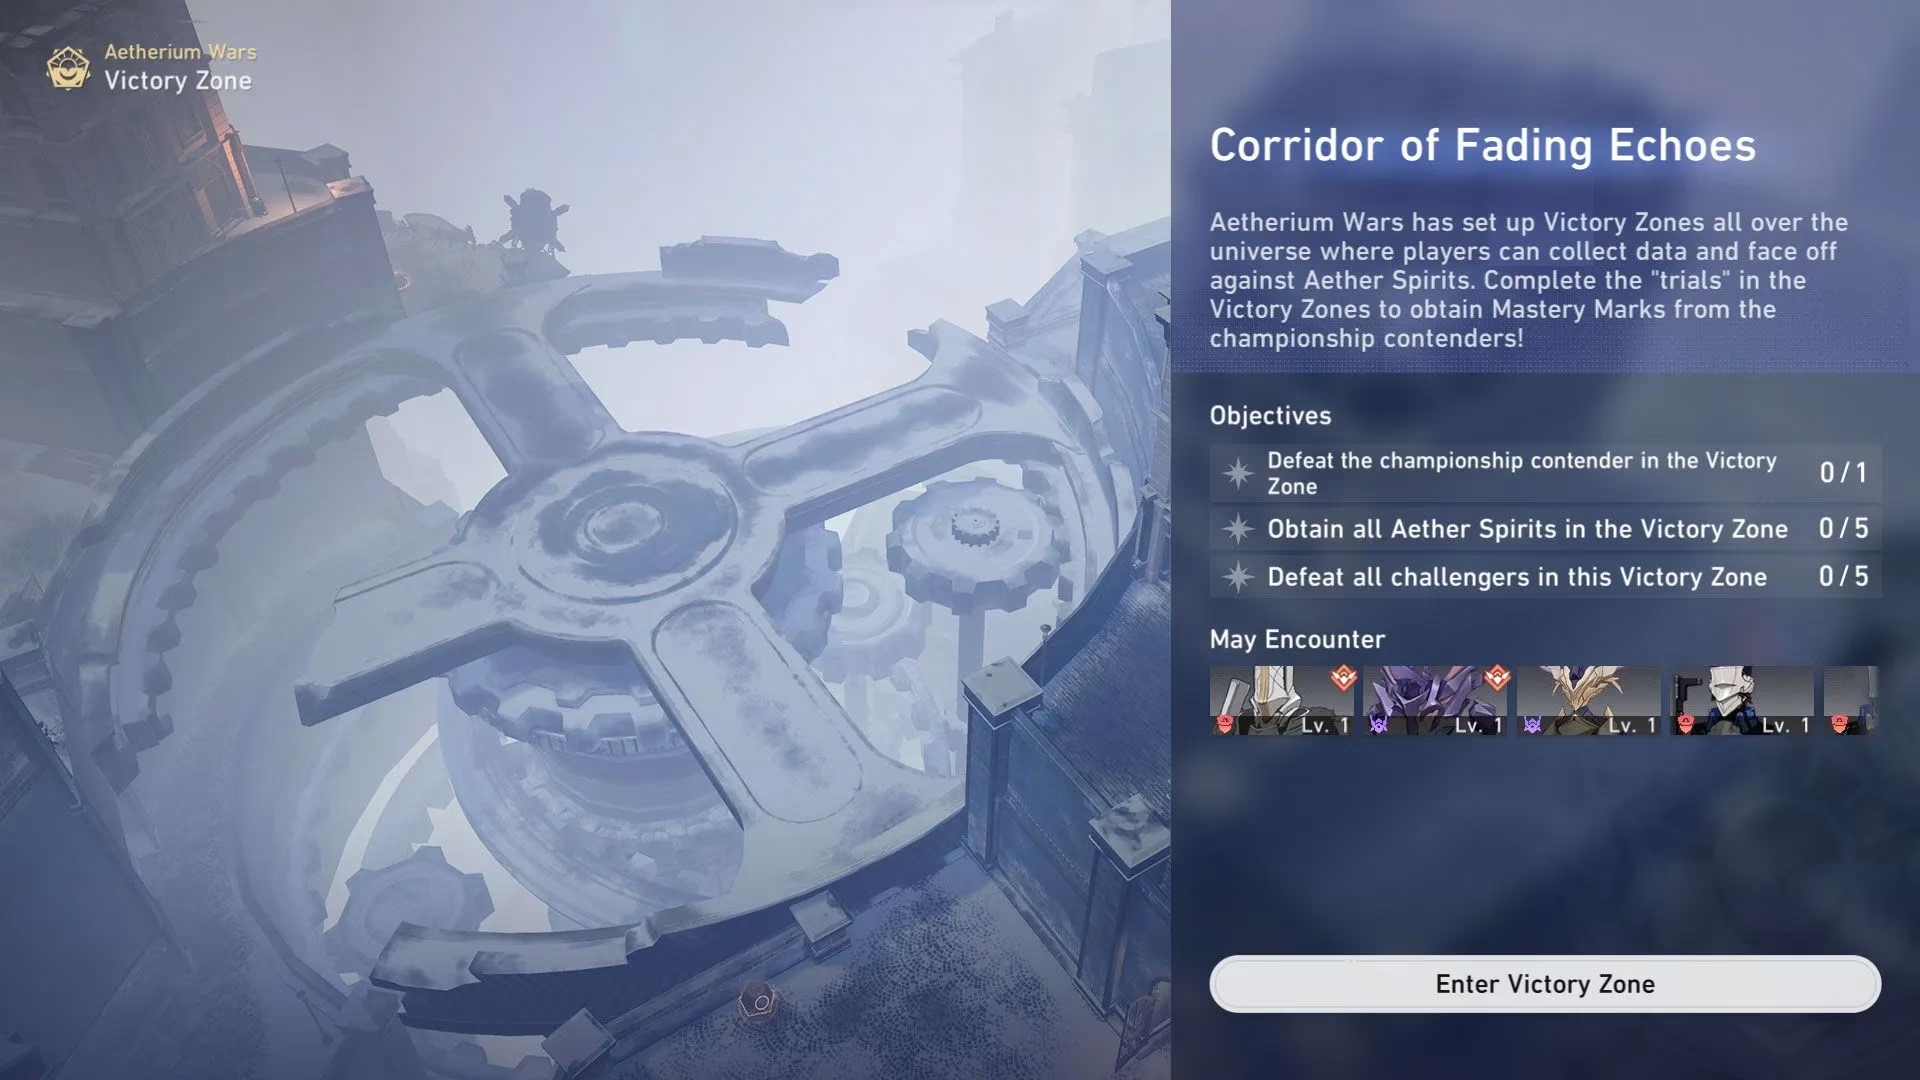
To start the challenge, interact with the Aetherium Wars Player Terminal in the Old Weapons Testing Ground. Select the Corridor of Fading Echoes from the four Victory Zones. At this stage it is the only unlocked option, so entering it teleports the player directly into the area.
After a brief conversation with March 7th, the Trailblazer spots Mr. Giovanni waiting a few steps ahead. Speaking with him triggers the core instructions for the zone. Victory Rating increases through two main activities: collecting Roaming Data by exploring and defeating Aether Spirits, and participating in Sparring Matches against rival trainers. Giovanni also provides a Blaze Out of Space Aether Spirit so the team can begin collecting Roaming Data immediately.
Collecting the First Aether Spirits
Aether Spirits are automatically added to the team after they are defeated for the first time. Because this is the opening Victory Zone challenge, the Trailblazer will naturally assemble a full squad here. The process mirrors normal overworld combat: approach the spirits as one would approach regular mobs, let them detect the player, and strike first to begin the encounter.
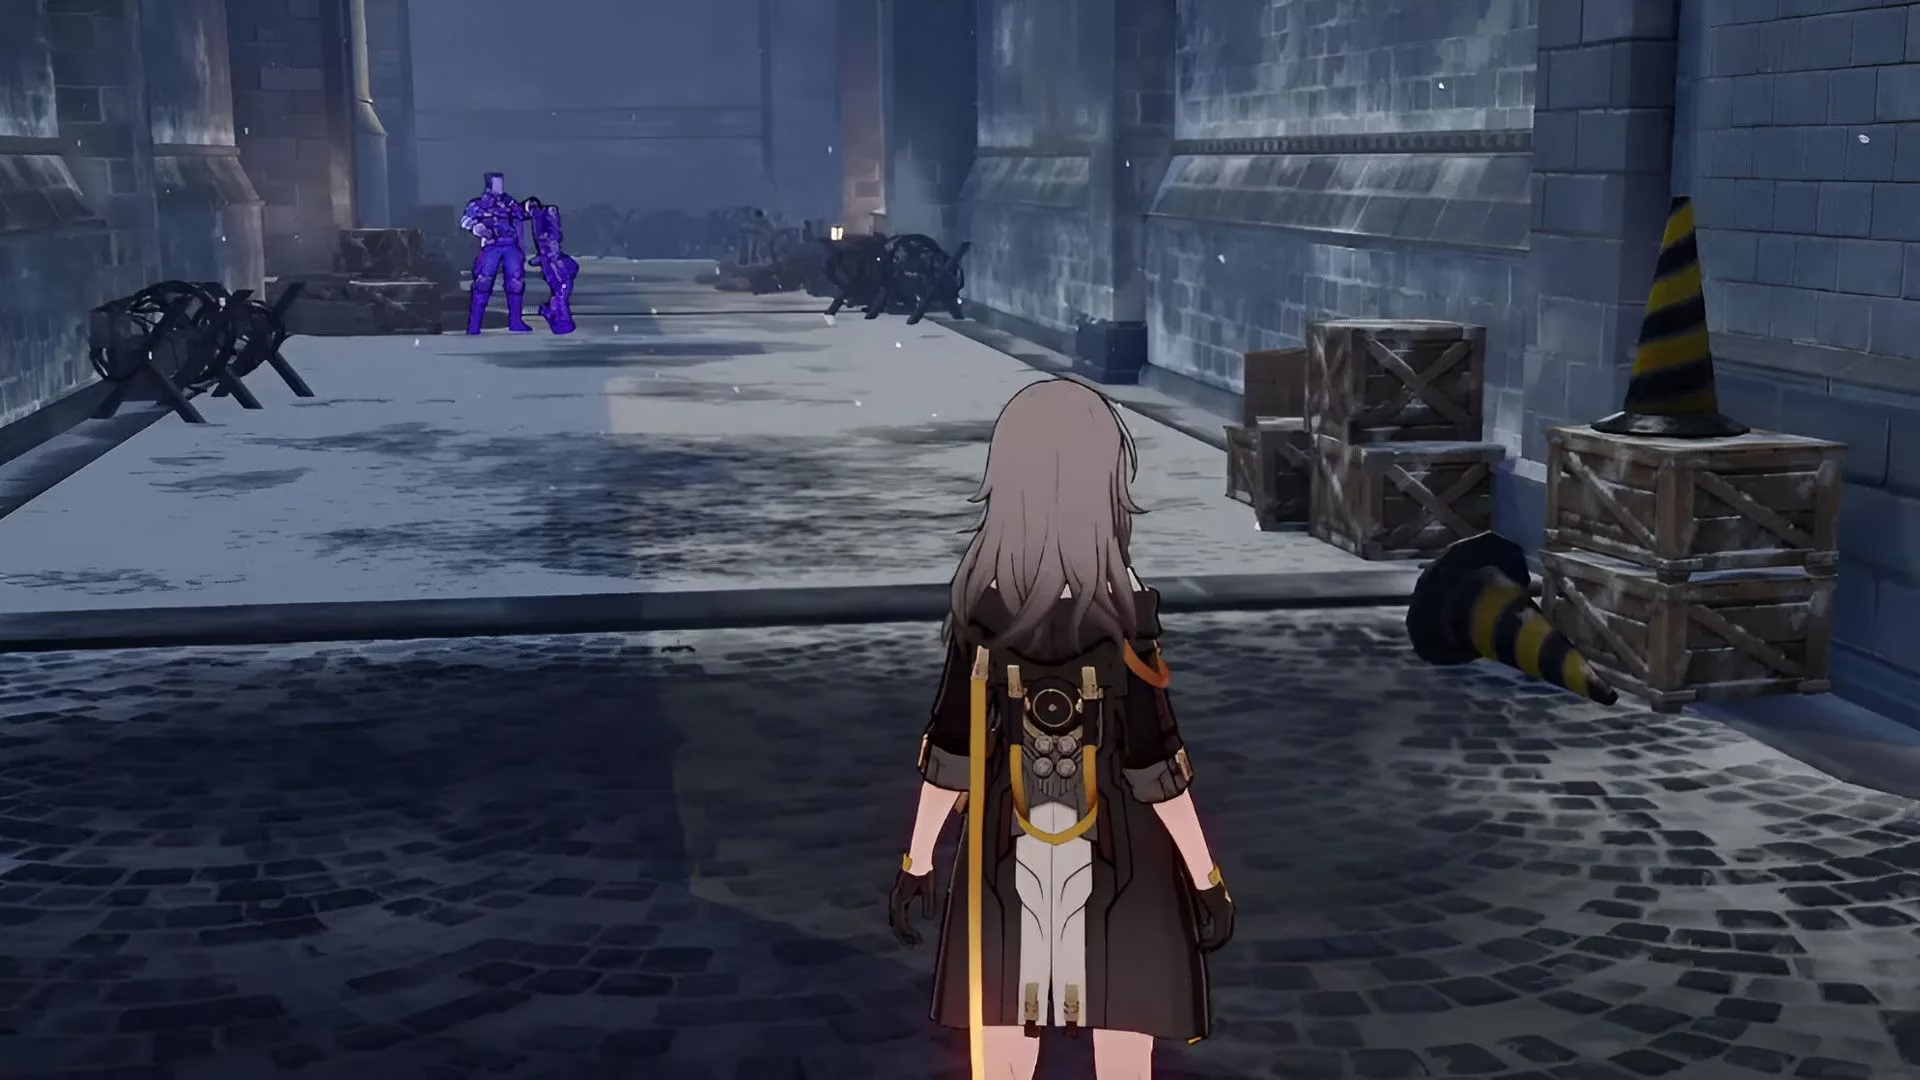
The first recruitable spirit is a Silvermane Canoneer straight ahead from Giovanni. After defeating and recruiting it, the player takes the next right turn and then an immediate left to find an Imaginary Weaver. Recruiting both units completes a basic team and unlocks further progression through the zone.
Advancing With Giovanni
After the first two recruits join the team, Giovanni gives the player Aether Expansion Chips. These items can be equipped to provide different buffs to Aether Spirits. The game prompts a quick test of the chip system, then the gate behind Giovanni opens.
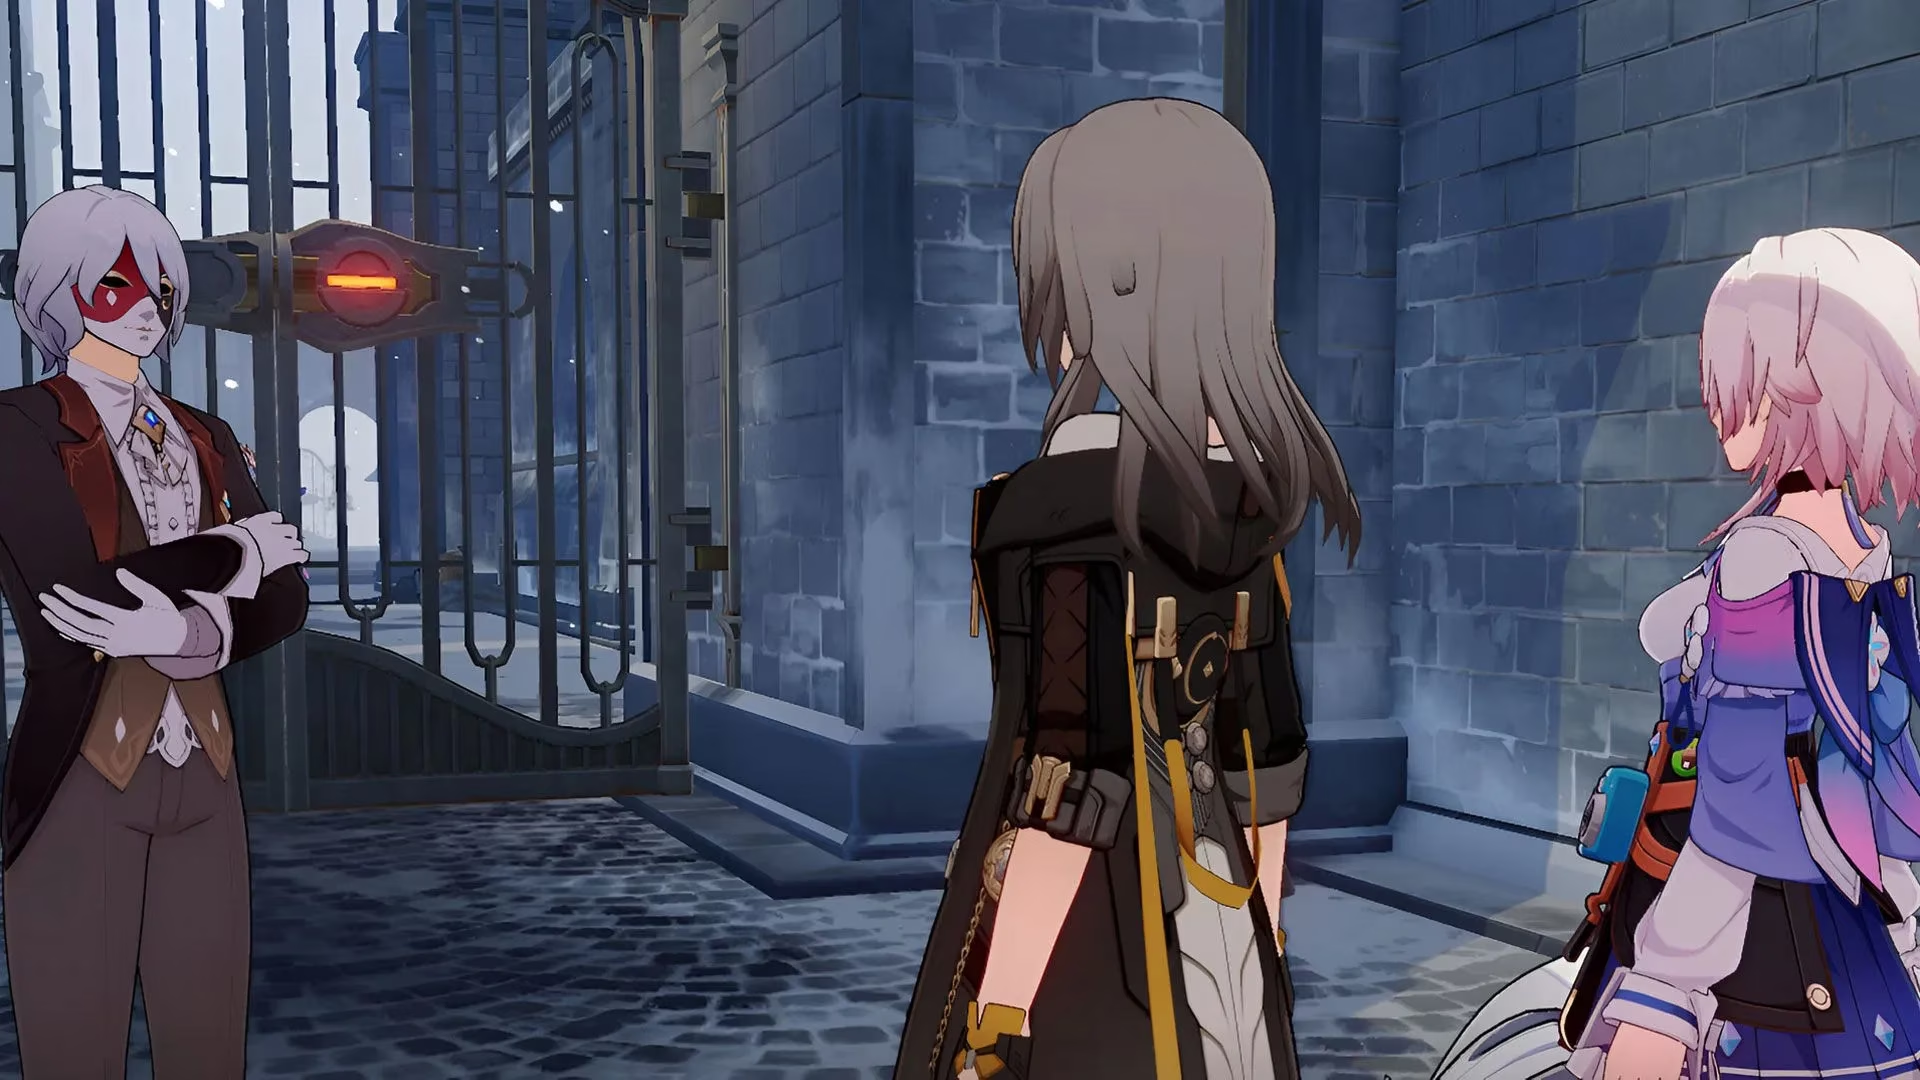
Immediately after the gate, an opponent blocks the path with a team of two Imaginary Weavers and one Silvermane Gunner. Winning that fight rewards Aether Spirit Upgrade Data x20, enough to raise Blaze Out of Space from level one to level two. Further ahead, Serval and Pela appear with Giovanni, March 7th, Luca, and Dunn. This encounter reveals that Serval and Pela are the Championship Contenders for this Victor Zone and introduces the Snowshine Lamp mechanics.
How Snowshine Lamp Puzzles Work
The Snowshine Lamp puzzles ask the player to place Thermic Cores into lamps and arrange crates so that the lamps' area of effect reaches all nearby targets. Some lamps require heat transfer from one lamp to another when they are outside direct range. The real challenge comes from moving crates and lamps without blocking the path to later objectives.
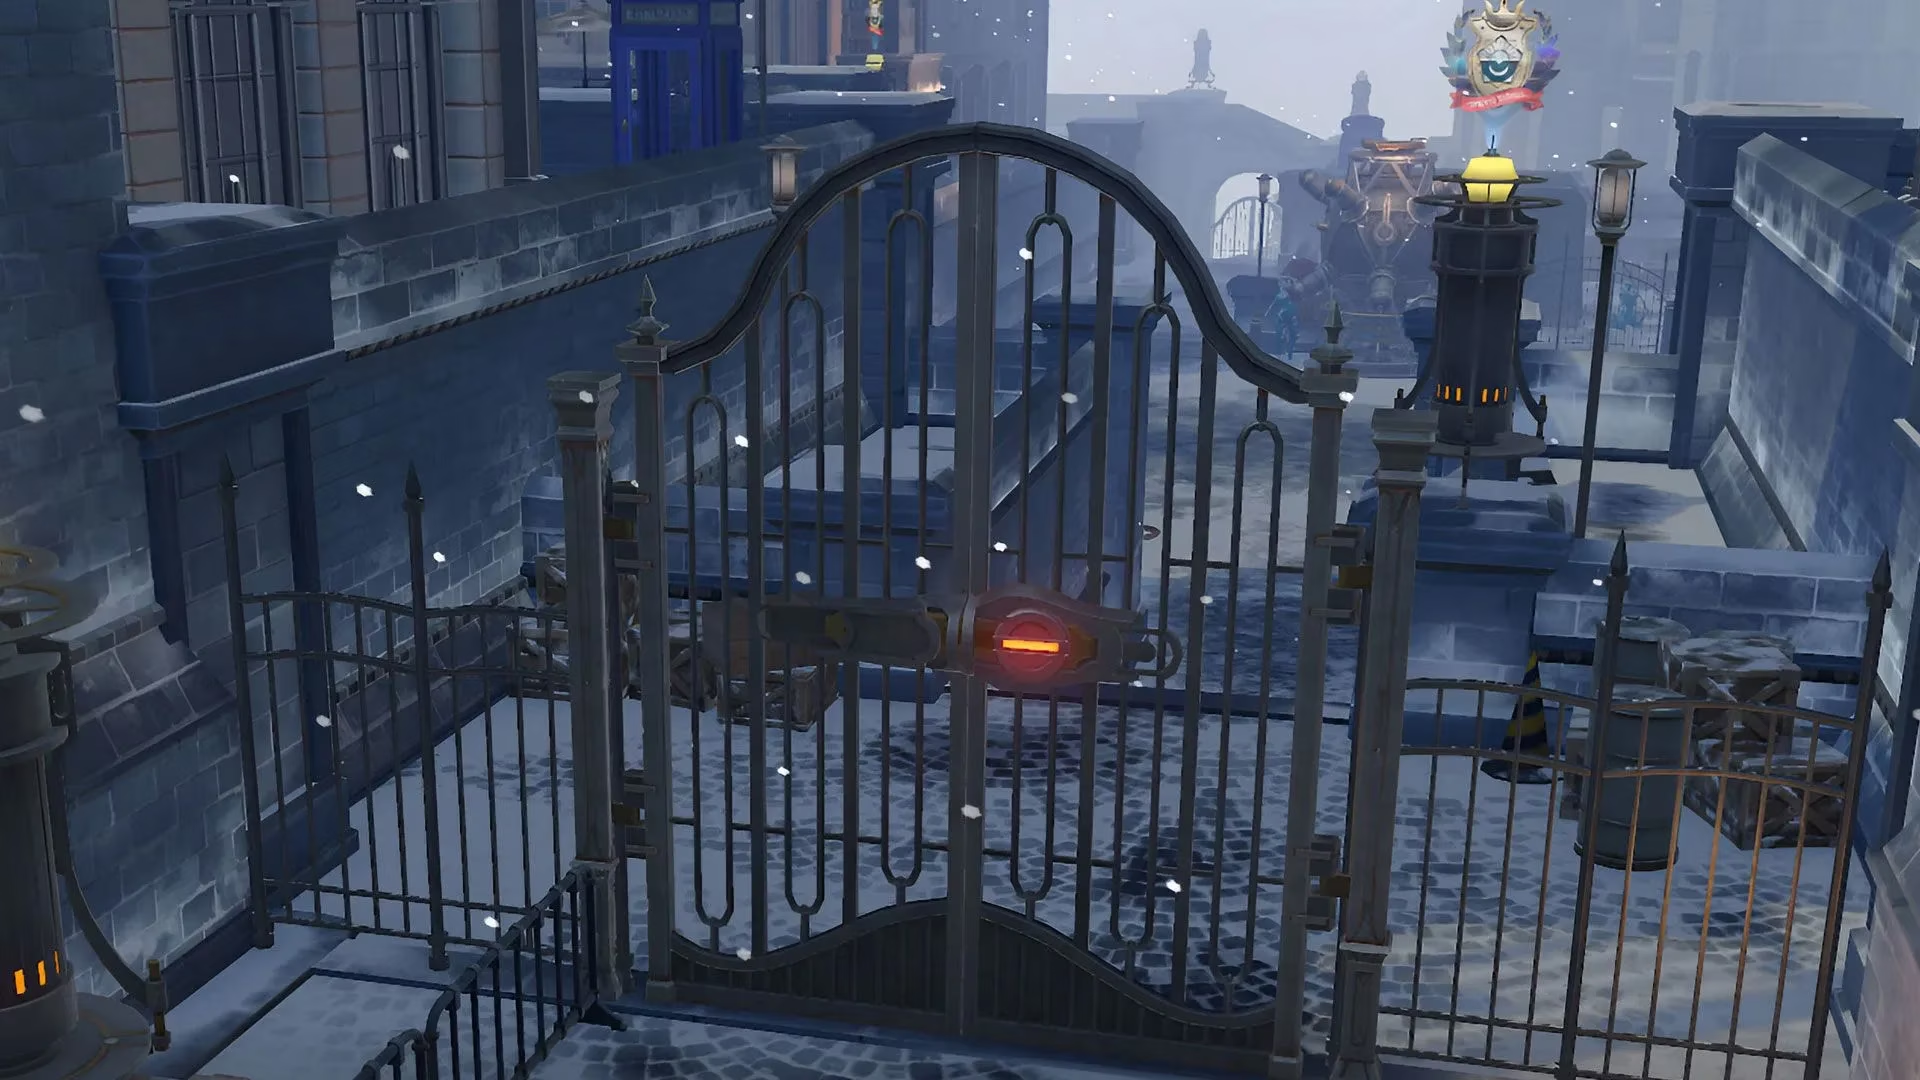
Snowshine Lamp Puzzle One
This puzzle sits in a small alley filled with crates. The goal is to reposition crates until the lamp on a crate can reach the lamp behind the fence.
| Step | Action | Visual Aid |
|---|---|---|
| 1 | Push all three leftmost crates further left to make room. | 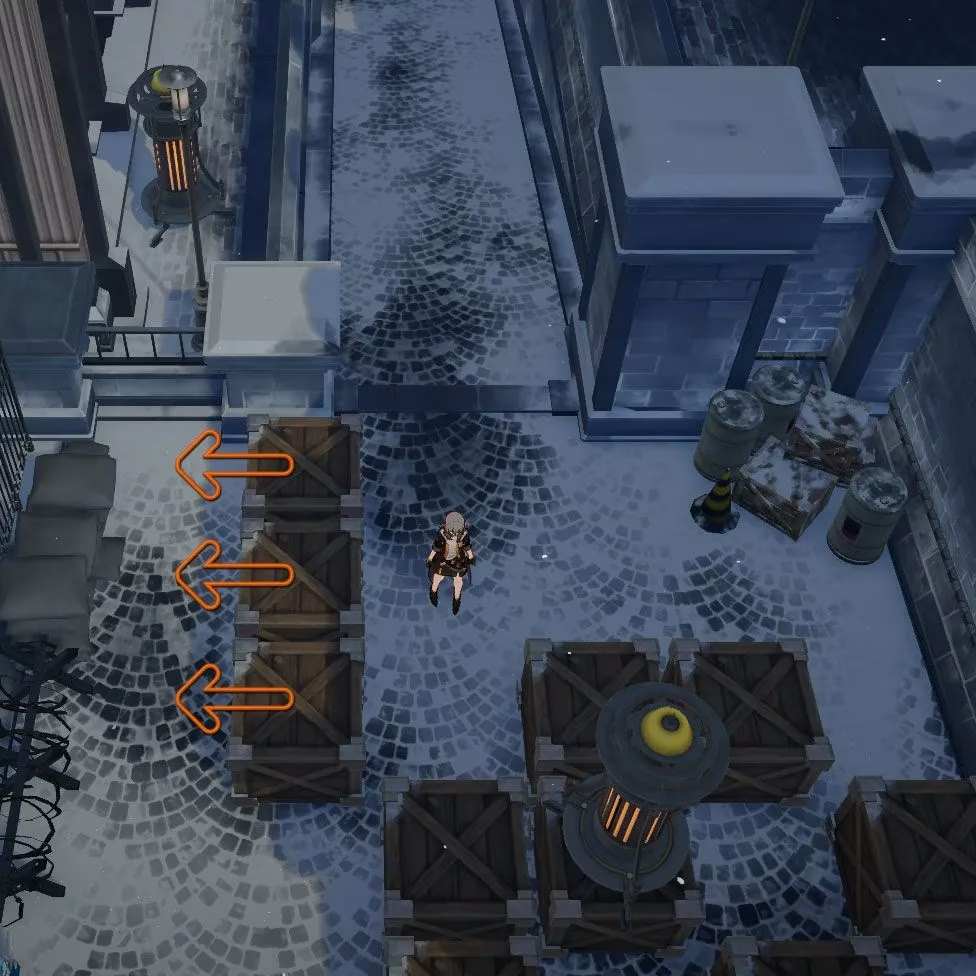 |
| 2 | Optional: head straight back and claim the chest before continuing. | 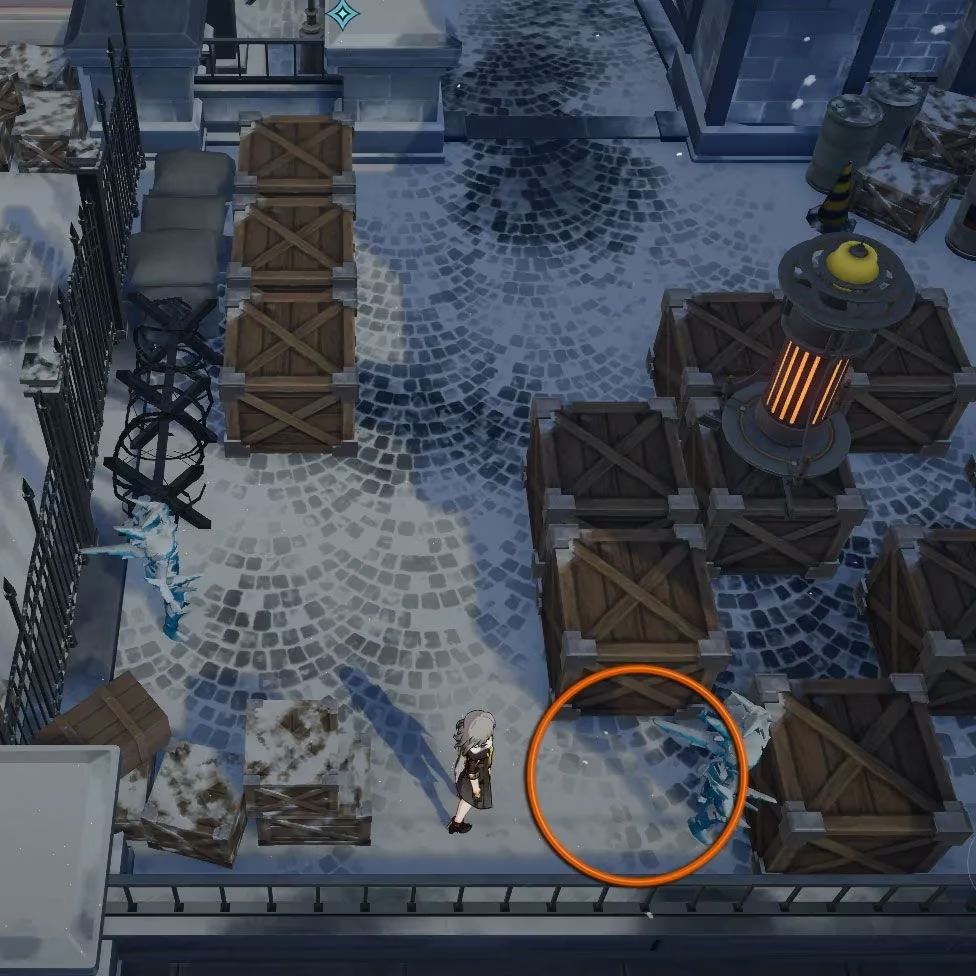 |
| 3 | Head right and push the rightmost crate one space back. | 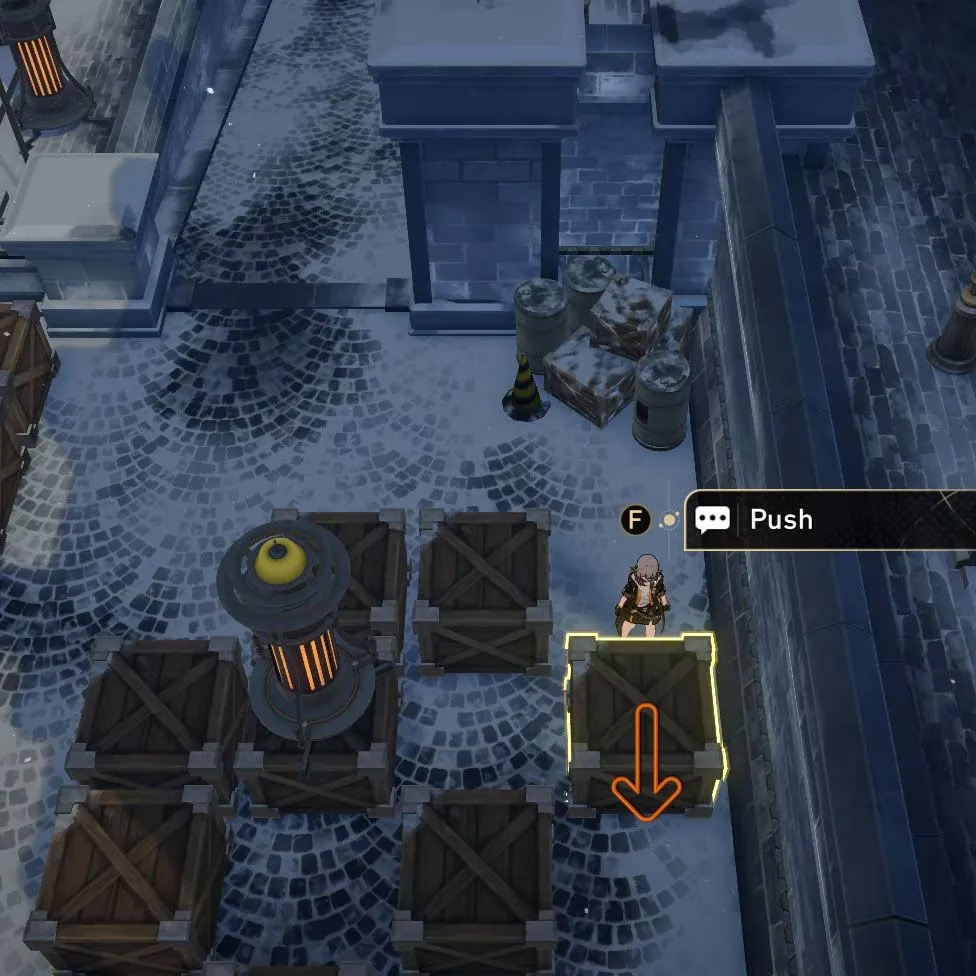 |
| 4 | Insert the Thermic Core into the lamp. | 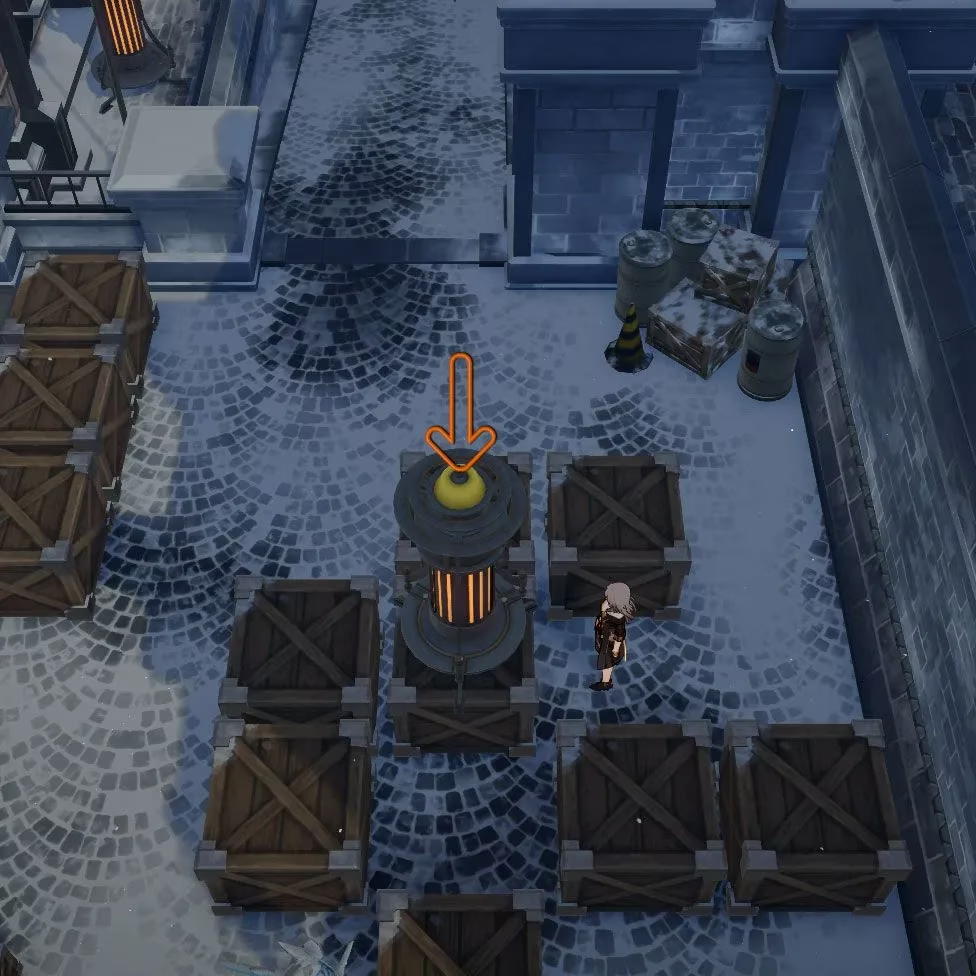 |
| 5 | Stand next to the lamp, turn north, and push that crate forward one space. | 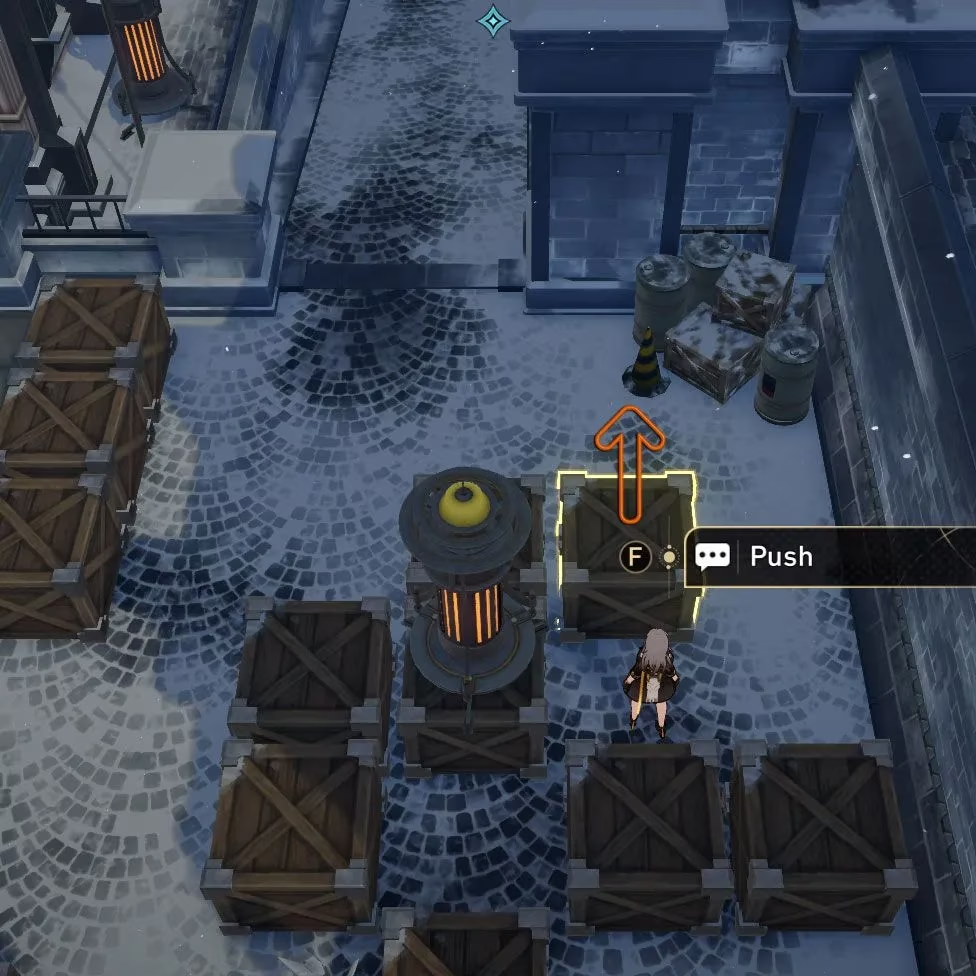 |
| 6 | Take one step forward, turn left, and push that crate left one space. | 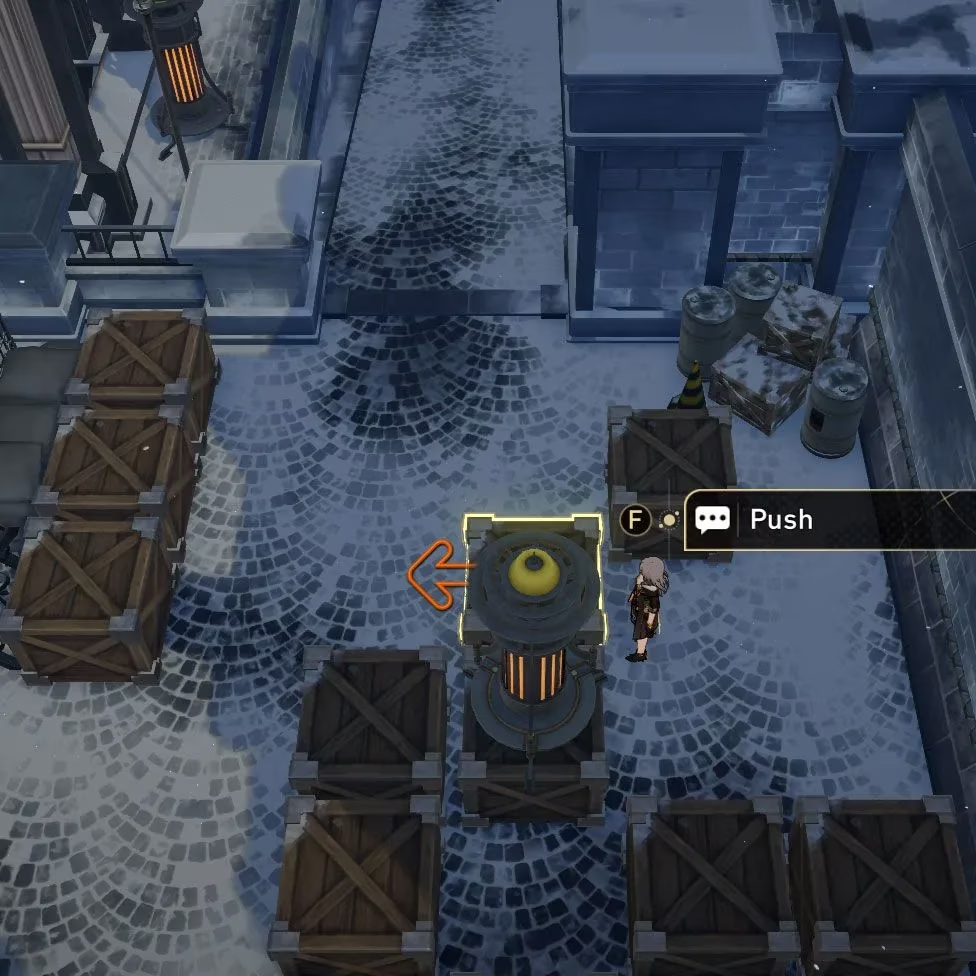 |
| 7 | Move right one space, head back south, and push that crate back one space. | 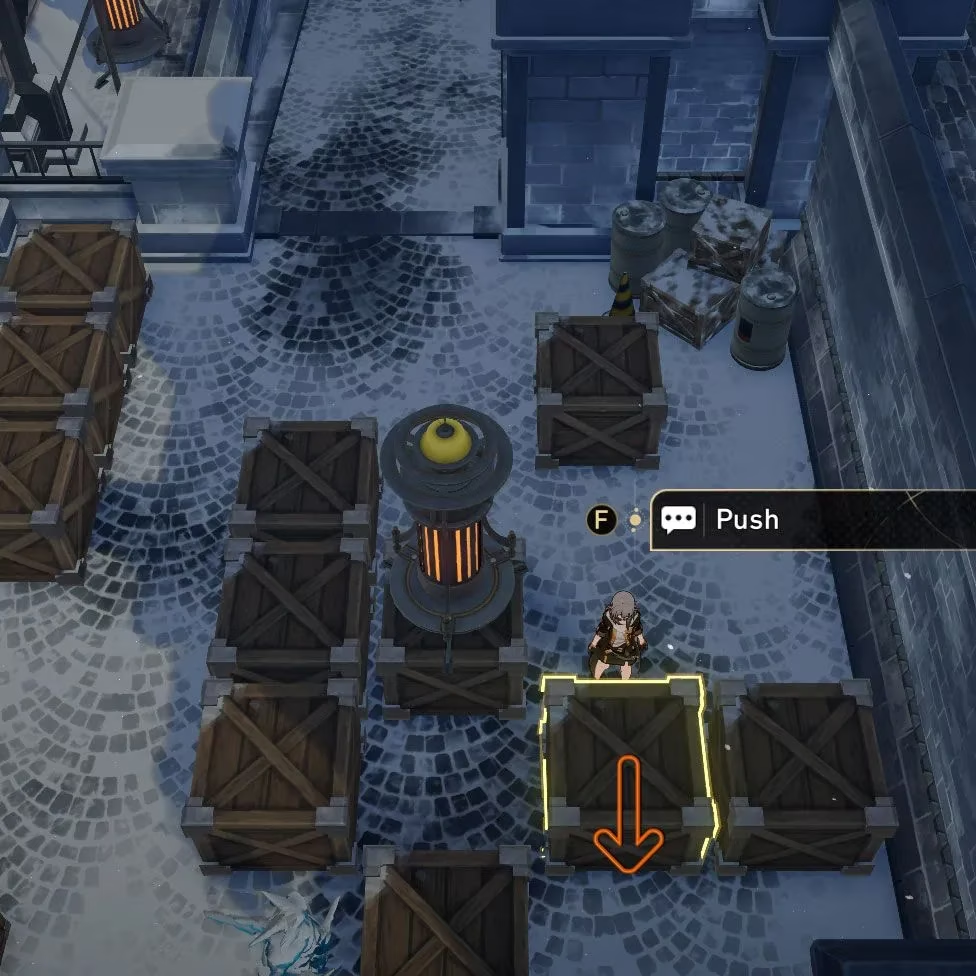 |
| 8 | Push the lamp forward one or two spaces to clear the path. | 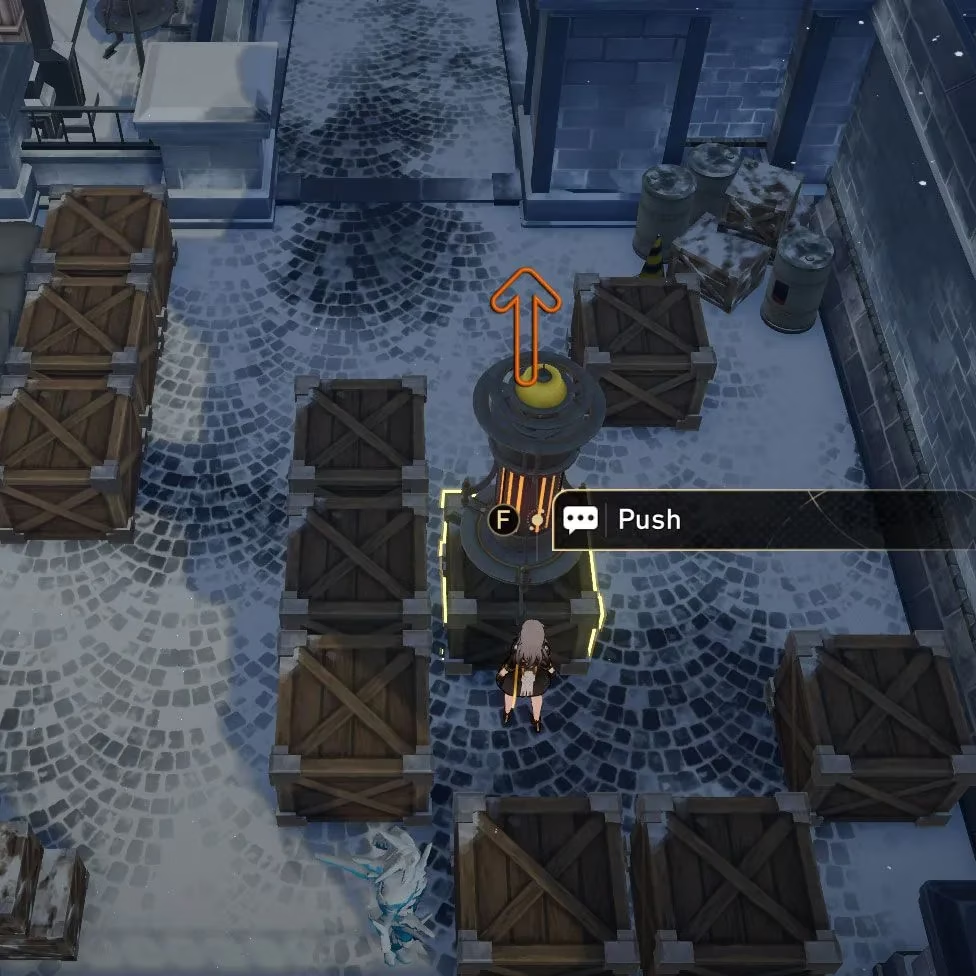 |
Snowshine Lamp Puzzle Two
After the first puzzle, return to the center of the corridor and take the eastern path. A challenger with two Imaginary Weavers and one Silvermane Canoneer blocks the way; defeating that trainer grants another Spirit Upgrade Data x20. The second puzzle appears at a dead end farther along.
| Step | Action | Visual Aid |
|---|---|---|
| 1 | Push the crate on the left toward the left by one space. | 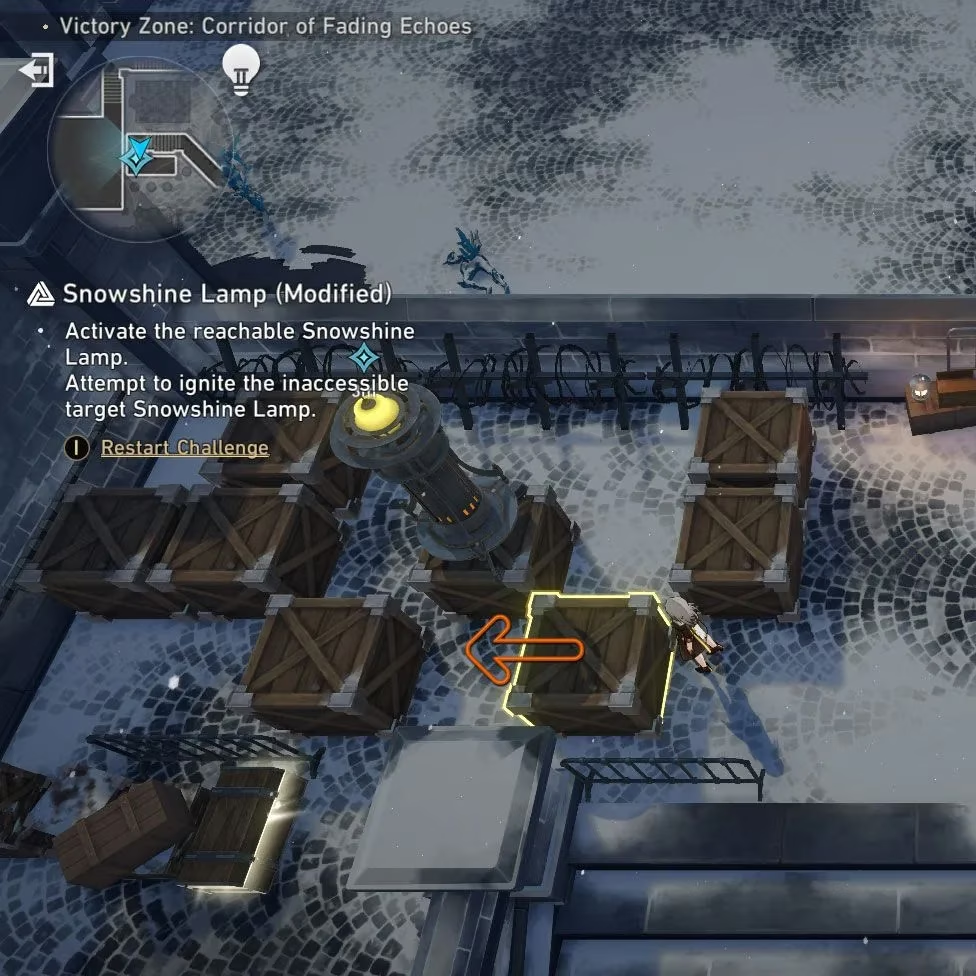 |
| 2 | Ignite the now-accessible lamp. | 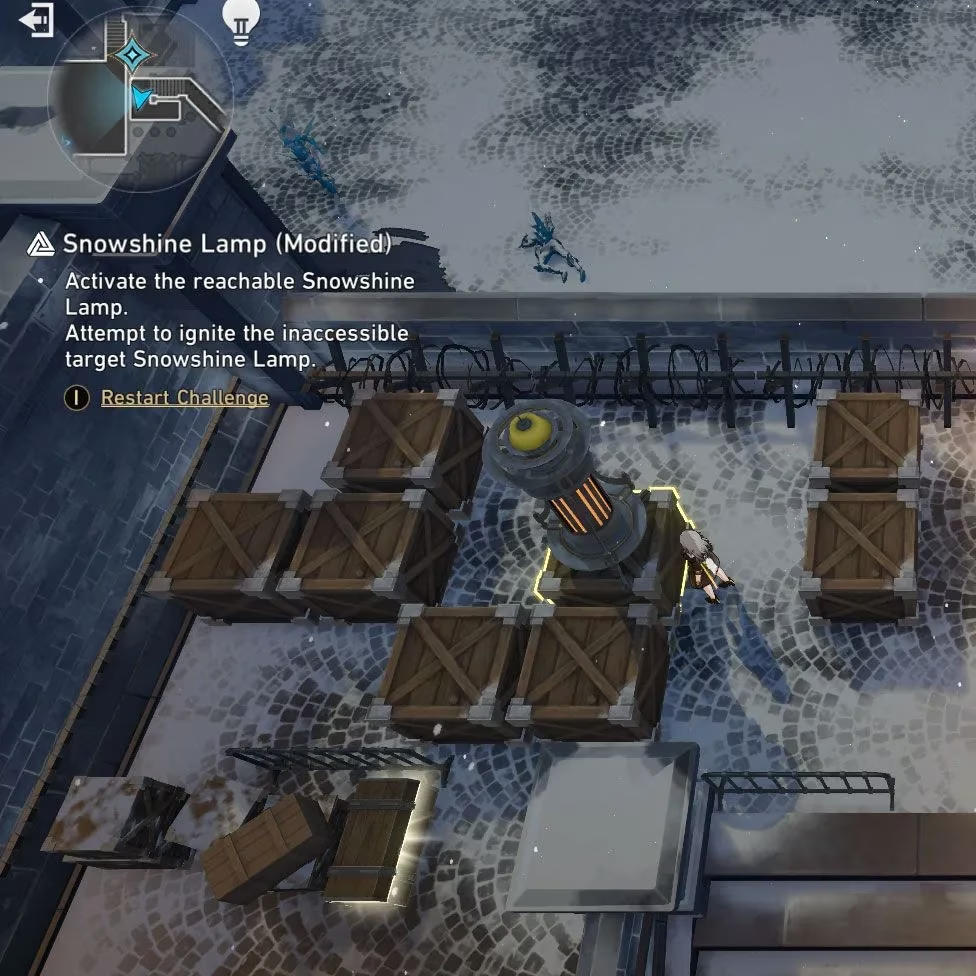 |
| 3 | Turn around and push the crate on the right toward the right by two spaces until it touches the fence. | 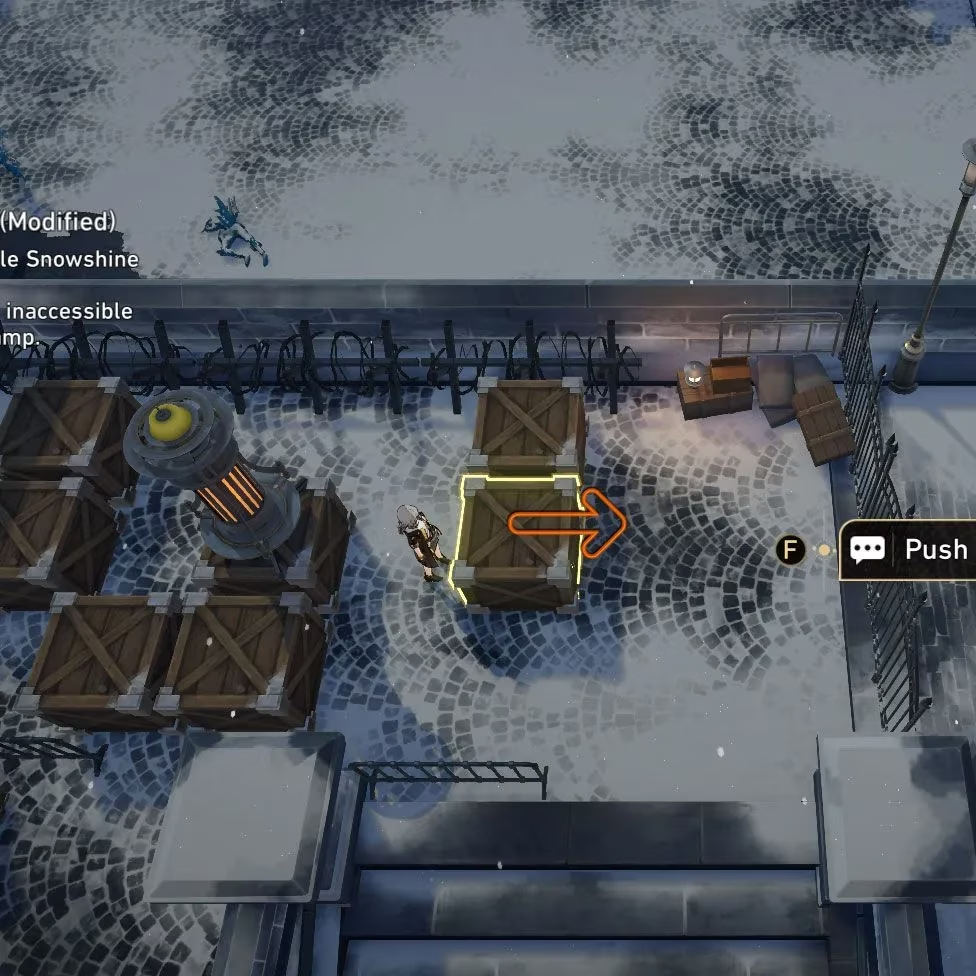 |
| 4 | Stand on the left side of the lamp and push it right three spaces until it rests against the previously moved crate. | 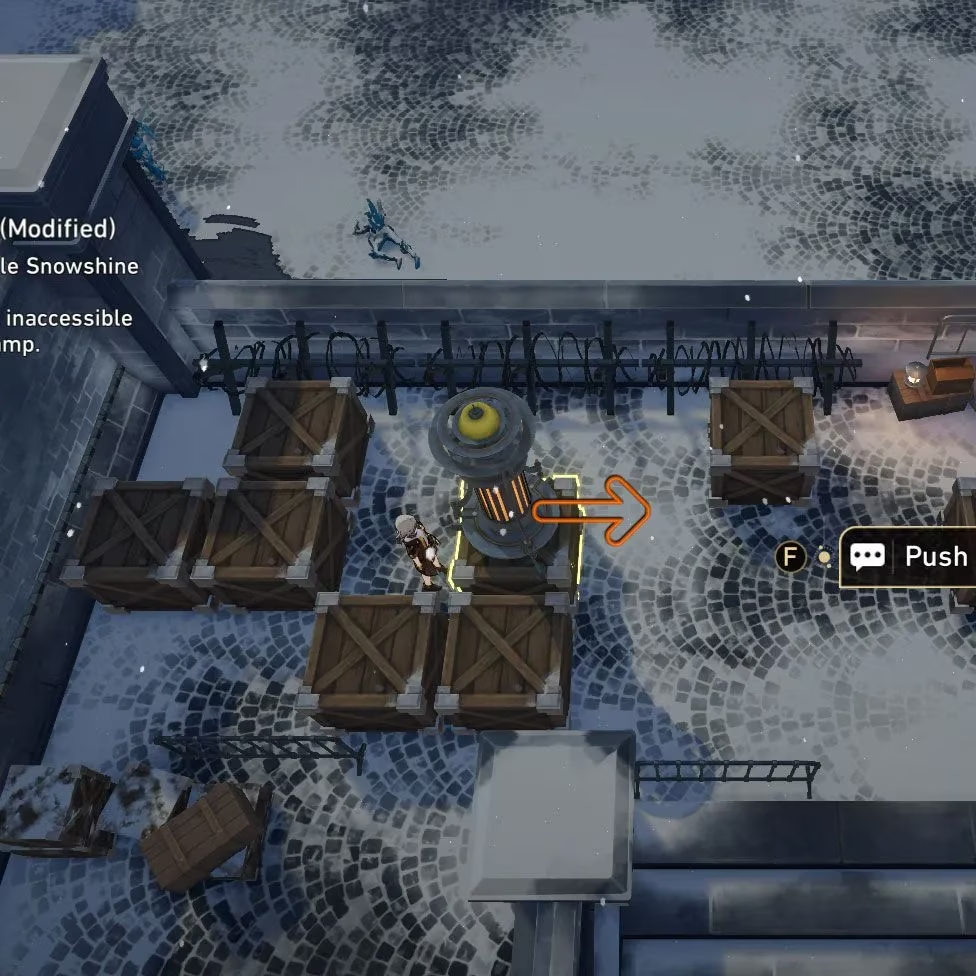 |
| 5 | To open the chest, restart the puzzle and push the top crate left one spot. | 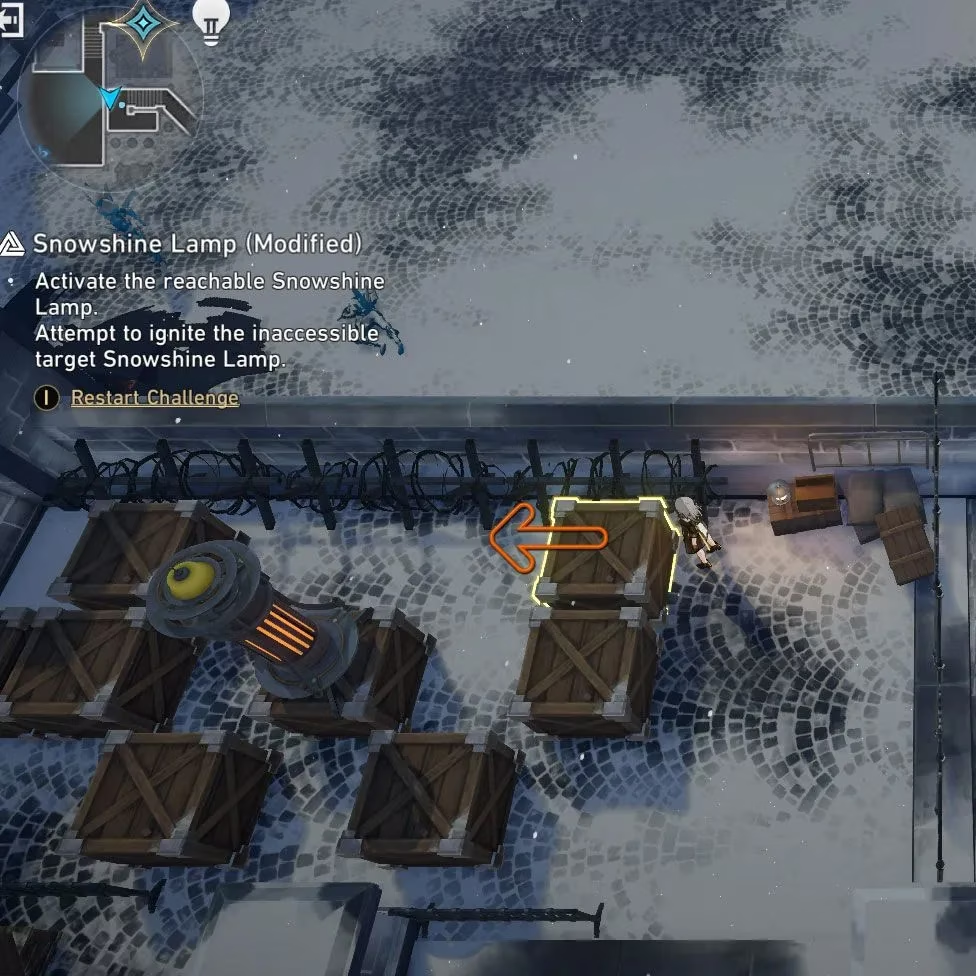 |
| 6 | Push the middle crate down one spot. | 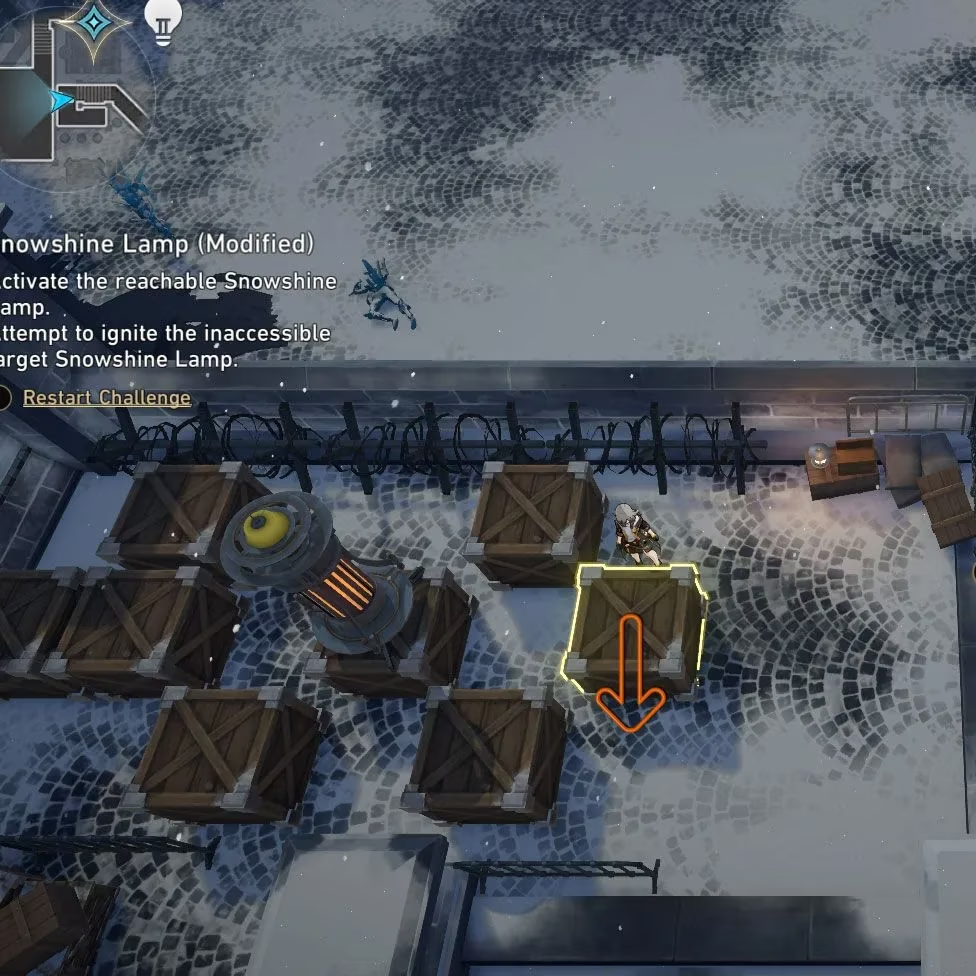 |
| 7 | Push the crate holding the lamp left one spot, then walk to the chest. | 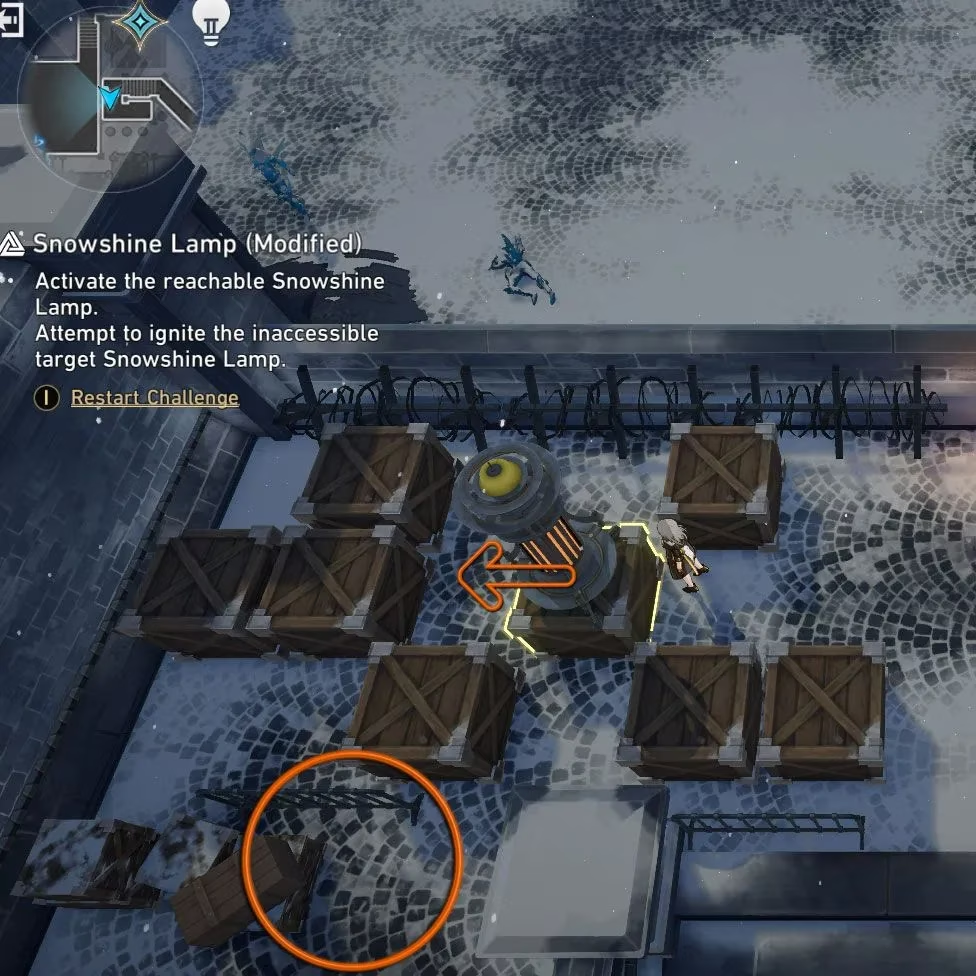 |
Snowshine Lamp Puzzle Three
Finishing the second puzzle unlocks the gate watched by the IPC employee. Continue forward to a gear-bridge. A lamp on the right belongs to the third and final puzzle. Activating the nearby Space Anchor gives a safe checkpoint before moving boxes.
| Step | Action | Visual Aid |
|---|---|---|
| 1 | Walk behind the first visible crate and push it upward to create space. | 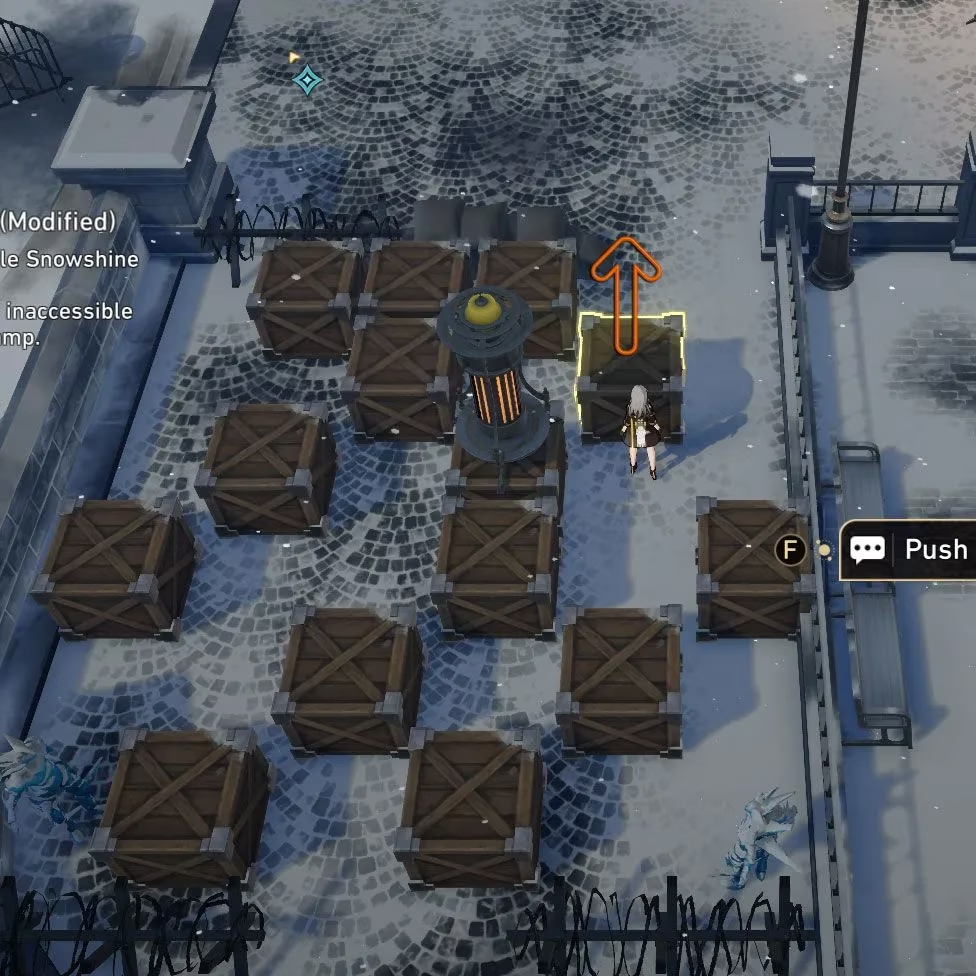 |
| 2 | Turn south and push that crate down one space. | 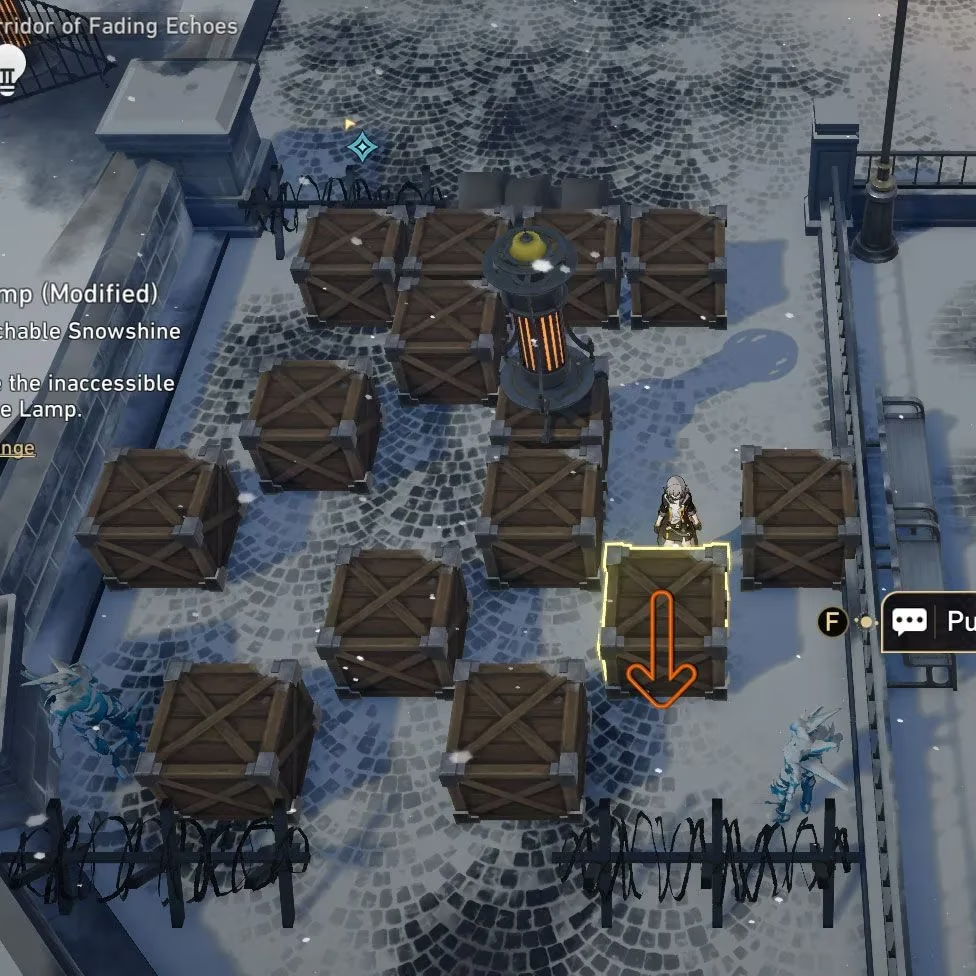 |
| 3 | Turn left and push that crate left two spaces until it is against the fence. | 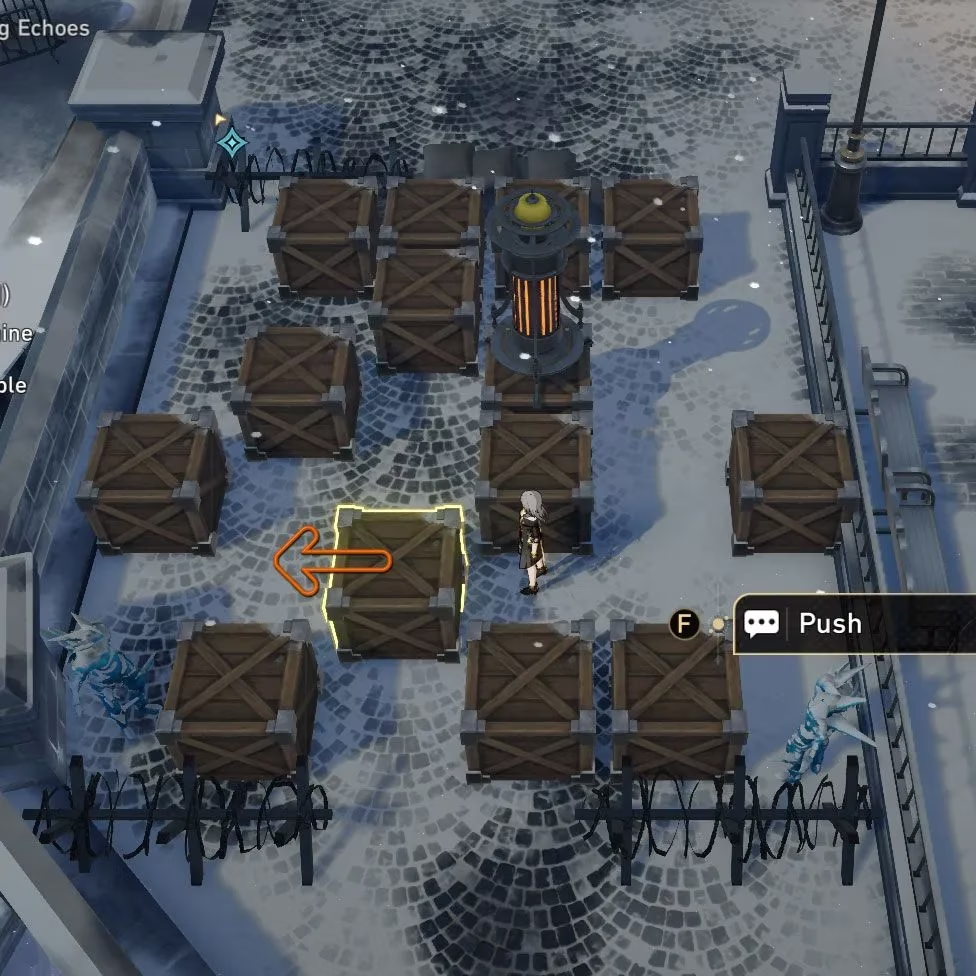 |
| 4 | Optional: head down and claim the chest before continuing. | 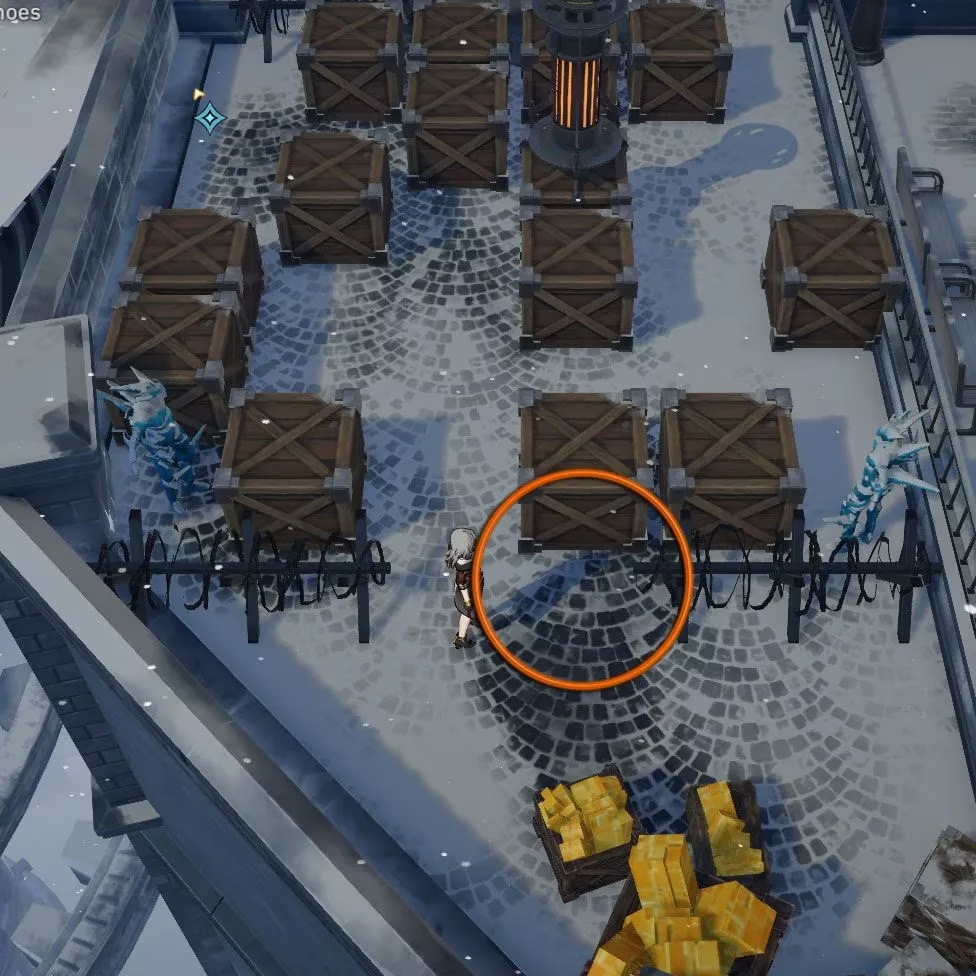 |
| 5 | Move into the space between the lamp and the crate on the right, then push that crate right one space. | 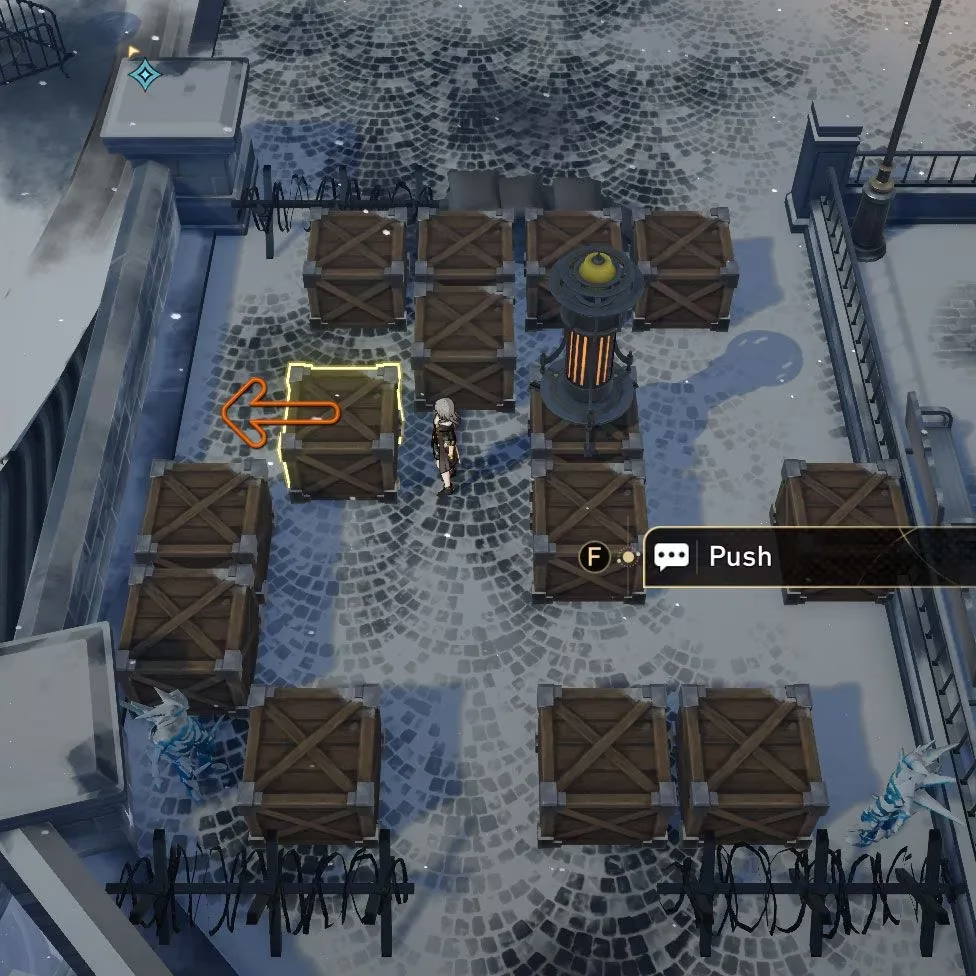 |
| 6 | Move up, look east, and push that crate right two spaces. | 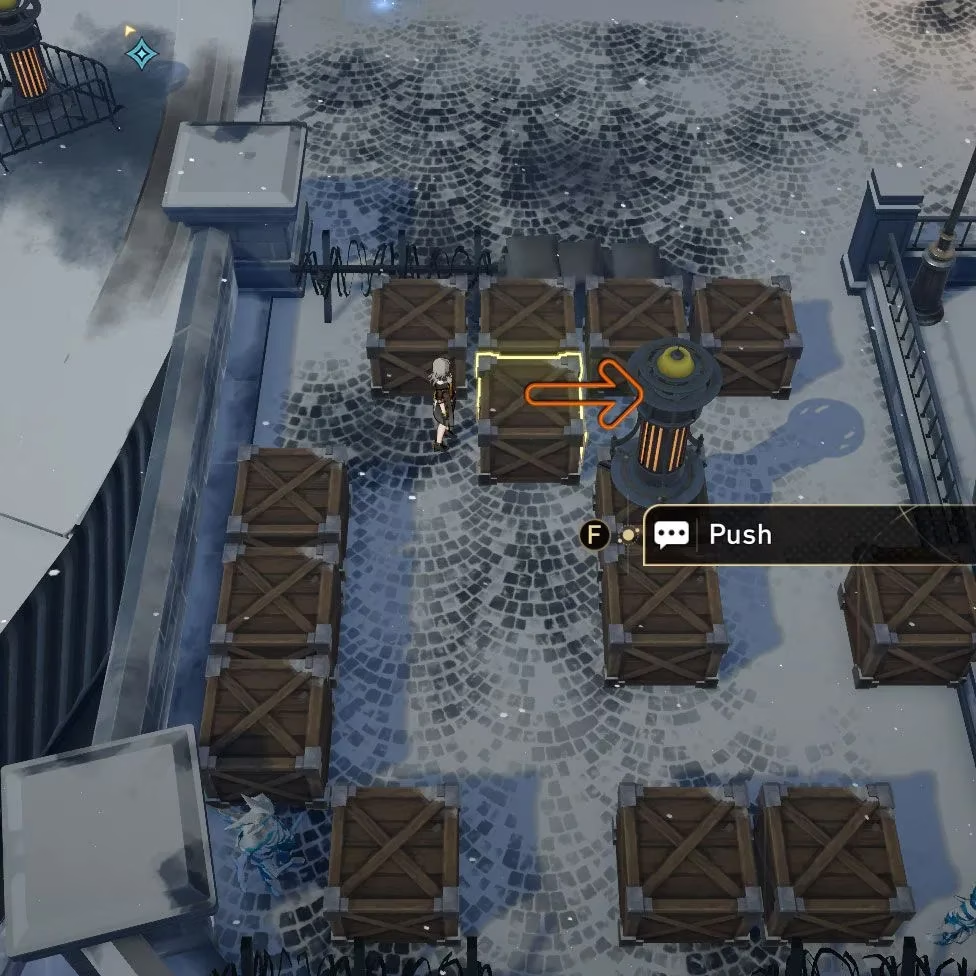 |
| 7 | Stand opposite the lamp, push it left one space, up one space, then left until it hits the fence. | 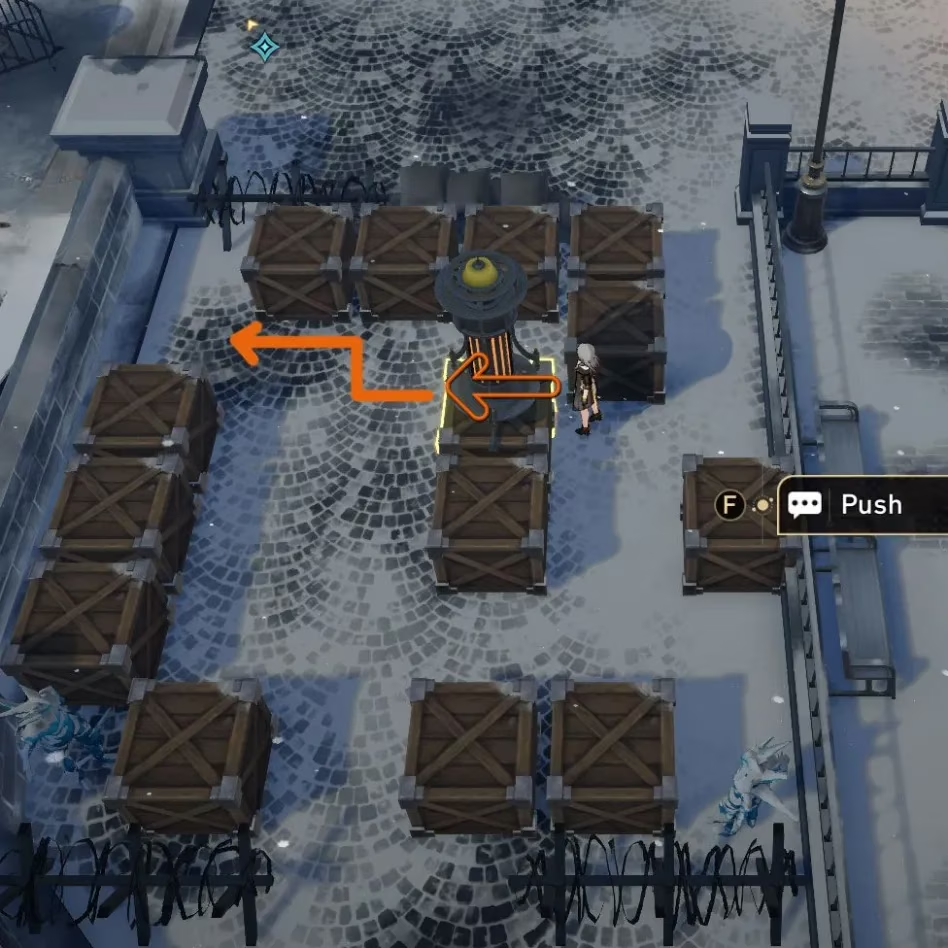 |
Unlike the previous two puzzles, completing the crate section does not automatically reach the target lamp. The player must turn the gear-bridge to bring the lamp into range. Head north into the nearby corridor, take a left, and defeat a challenger with two Incineration Shadewalkers, a Silvermane Gunner, and a Silvermane Canoneer. An Imaginary Weaver waits just past that trainer, so both enemies must be cleared to reach the switch. Unlock the switch and turn the gear clockwise two consecutive times to finish the puzzle.
Dueling Serval and Pela
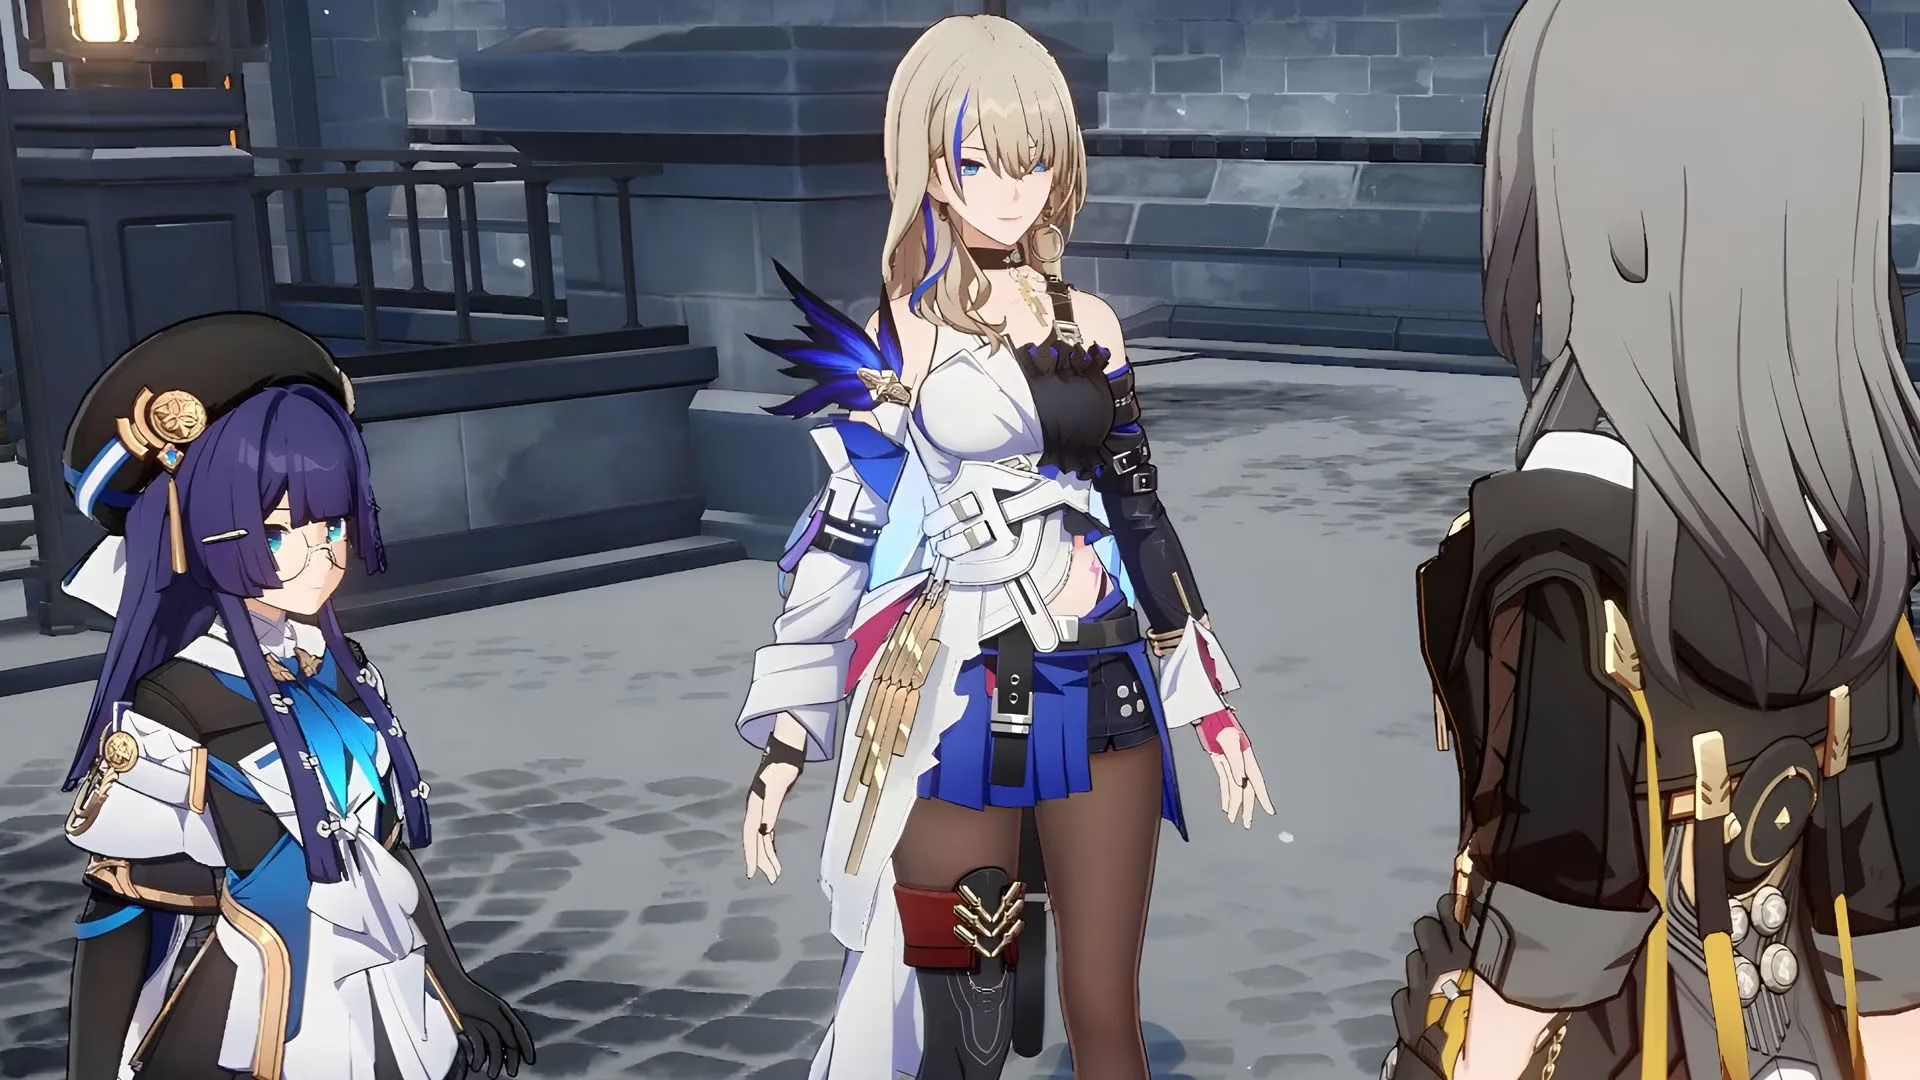
After crossing the gear-bridge, another challenger appears with two Imaginary Weavers, a Silvermane Gunner, and a Silvermane Canoneer. She stands between the player and a Precious Treasure chest, so she must be defeated. Beyond the unlocked gate, Serval and Pela wait in the main corridor for the Championship Contender battle.
A few preparation tips make the final duel much easier. Players should level all Aether Spirits using the materials gathered throughout the zone and equip every available chip slot. The Wrap Trotter's Hogdash ability deals minor damage while healing the team, so activating it early is essential because the Silvermane Lieutenant hits hard. The Imaginary Weaver's consecutive attack effect should be used aggressively, while the Silvermane Canoneer is more valuable as a support unit than as a normal attacker. Keeping skill points available for the Canoneer's support turn helps maintain pressure without losing tempo.
Winning the fight concludes the main Victory Zone challenge and awards the Mastery Mark.
After the Mastery Mark
Once the main challenge ends, a previously blocked area becomes accessible. This special section contains the last challenger and the final collectible Aether Spirits, including the powerful Silvermane Lieutenant. The quest, however, does not fully close until the player exits the Victory Zone and defeats the unsavory IPC workers who caused trouble for March 7th and the Trailblazer at the start of the event. Only after that rematch is the Corridor of Fading Echoes truly complete.