When Honkai: Star Rail surprised the community by giving away the five-star Imaginary Hunt character, Dr. Ratio, for free back in version 2.0, it was a celebration that left a lasting impact. Fast forward to 2026, and Dr. Ratio remains a cornerstone for many players' rosters, a testament to his enduring power and flexible playstyle. Claiming him during that limited-time event was a masterstroke, granting access to a unique DPS whose damage revolves around strategic follow-up attacks triggered by enemy debuffs. While the initial giveaway window has long passed, the strategies for maximizing his potential are more refined than ever.

🏆 Best Dr. Ratio Relics & Planar Ornaments
The foundation of any powerful Dr. Ratio build lies in his equipment. For veterans and new players alike who have reached the game's endgame, selecting the right Relics is the first and most crucial step. These items are the primary source for boosting his HP, ATK, and critical stats, with specific sets offering unique synergies that perfectly complement his debuff-centric kit.
Let's break down the top choices, updated for the current meta:
| Type | Name | Reason For Synergy With Dr. Ratio |
|---|---|---|
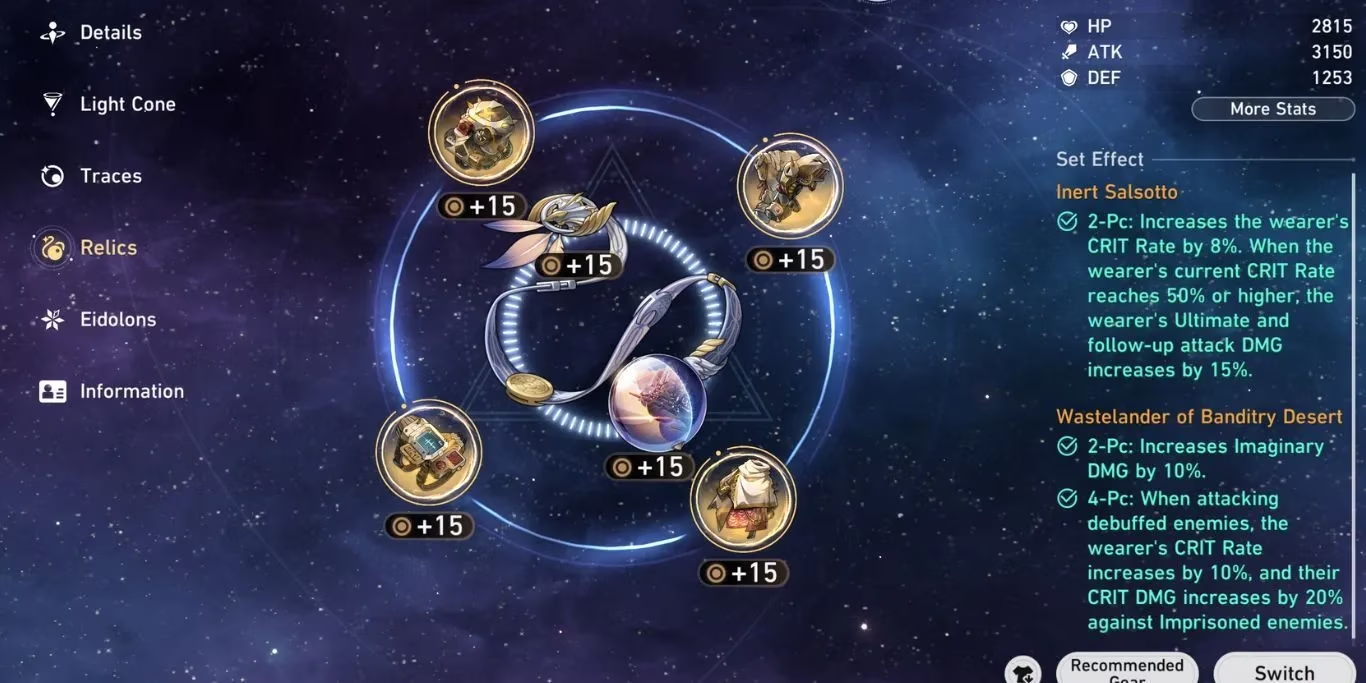
| Relics | Wastelander of Banditry Desert | This set is often considered his best-in-slot. It provides a free 10% Crit Rate when attacking a debuffed enemy, which aligns perfectly with his playstyle and significantly reduces the Crit Rate burden from substats. Furthermore, it grants a massive 20% Crit DMG bonus against Imprisoned enemies, especially potent if Dr. Ratio himself breaks the enemy's Toughness bar. |
| Genius of Brilliant Stars | This serves as a powerful alternative, particularly when facing enemies with Quantum Weakness. While the two-piece bonus is wasted on him, the four-piece effect's 20% DEF Ignore is one of the strongest buffs in the game. This DEF shred stacks multiplicatively with other sources, like that from his signature Light Cone, leading to massive damage spikes. | |
| The Ashblazing Grand Duke | A decent but generally outclassed option. This set focuses on buffing follow-up damage, but the ATK% bonus from the four-piece stacks too slowly for Dr. Ratio's rhythm, offering less overall value compared to Wastelander. | |
| 2-Piece ATK% / SPD Mix | A flexible, high-value temporary solution. Using two pieces from different sets that provide ATK% (like Musketeer) is highly effective. A combination of a SPD set and an ATK% set is also a solid stopgap while farming for perfect 4-piece sets. | |
| Planar Ornaments | Firmament Frontline: Glamoth | The premier offensive choice. This set grants 12% ATK and 12% DMG at 135 SPD, with the DMG bonus increasing to 18% at 160 SPD. Since Dr. Ratio wants high SPD to trigger his follow-ups more frequently, this set's conditions are naturally met for optimal output. |
| Inert Salsotto | A fantastic and reliable option that directly buffs his key damage sources. It increases both Follow-up Attack and Ultimate DMG, covering two of his three primary damage avenues. The 8% Crit Rate bonus, while nice, is often less critical due to the abundance of Crit Rate in his kit. | |
| Space Sealing Station | A beginner-friendly ornament that remains relevant. It provides a straightforward 24% ATK boost as long as Dr. Ratio has 120 SPD, a threshold that is very easy to achieve with modern gear. |
📊 Dr. Ratio Relic Stat Priority
Knowing which sets to farm is only half the battle. The real grind begins with acquiring pieces that have the correct main stats and valuable substats. As a main DPS, Dr. Ratio demands a careful balance of several key attributes: SPD, ATK, Crit DMG, and Crit Rate. It's surprisingly easy to overcap on Crit Rate with him, so planning is essential.
Here is the stat priority guide for 2026:
| Relic Type | Main Stat Priority | Sub Stat Priority |
|---|---|---|
| Head | HP (Fixed) | Crit DMG > Crit Rate > ATK% > SPD |
| Hands | ATK (Fixed) | Crit DMG > Crit Rate > ATK% > SPD |
| Body | Crit DMG | Crit Rate > ATK% > SPD > HP% |
| Feet | SPD | Crit DMG > Crit Rate > ATK% |
| Planar Sphere | Imaginary DMG Bonus | Crit DMG > Crit Rate > ATK% > SPD |
| Link Rope | ATK% | Crit DMG > Crit Rate > SPD |
Remember, the goal is to aim for a high Crit DMG (180%+) while maintaining a Crit Rate around 70-80% (including all external bonuses). SPD should ideally reach the 134 or 135 breakpoint to ensure more turns, with 160 being an ambitious goal for maximizing Glamoth.
✨ Best Dr. Ratio Light Cones
The right Light Cone can dramatically elevate Dr. Ratio's performance. While several options are decent, only a few synergize perfectly with his mechanics. His kit's unique interaction with debuffs makes some Light Cones far more valuable than others.
-
Baptism of Pure Thought (Signature): Undisputedly his best-in-slot. It provides a massive Crit DMG boost up to 44% when the wearer hits a debuffed enemy. Its passive also increases his Ultimate DMG and, most importantly, allows his follow-up attacks to ignore a portion of the target's DEF, a rare and incredibly powerful effect that scales exceptionally well into the late game.
-
Worrisome, Blissful: A strong limited 5-star alternative. At Superimposition 1, it offers 18% Crit Rate and 24% Crit DMG. While the Crit Rate is often redundant, the follow-up DMG increase it provides makes it a highly competitive and decent choice for him.
-
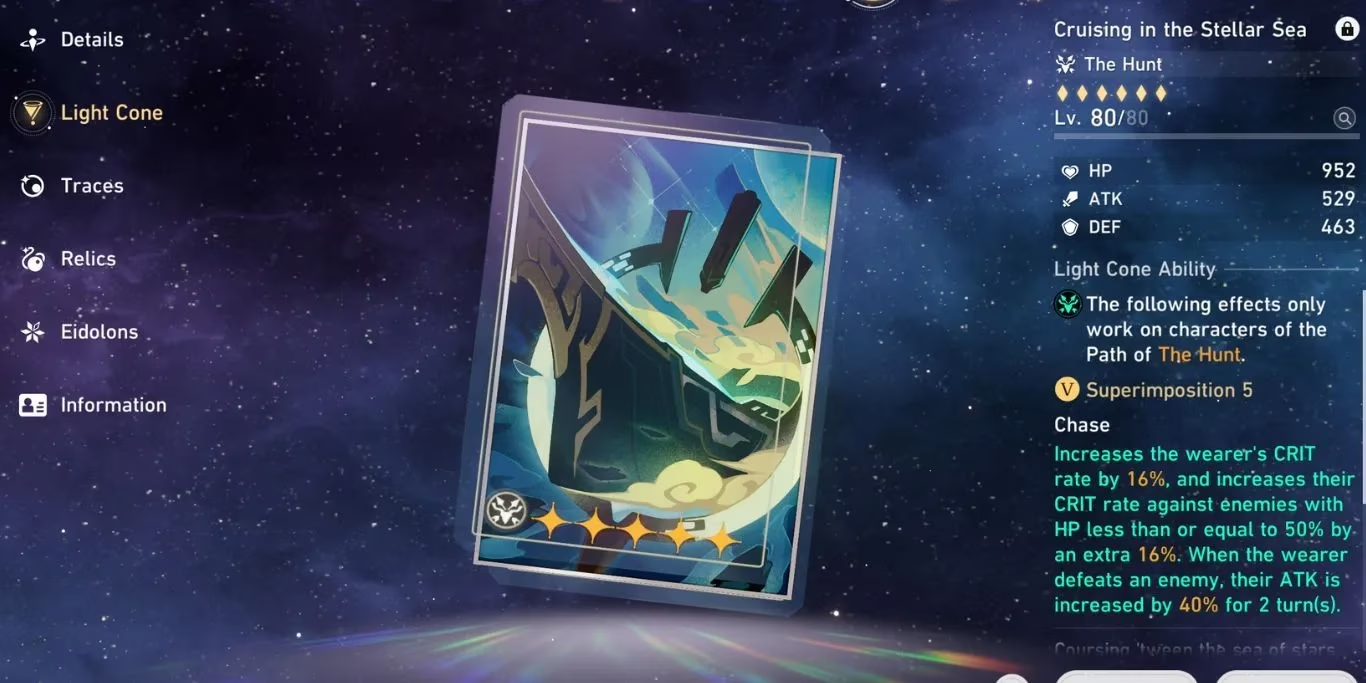
Cruising in the Stellar Sea (F2P): The best free-to-play option, easily obtainable at Superimposition 5 from the Simulated Universe store. It does provide more Crit Rate than needed, but the substantial ATK boost from its passive when defeating enemies or attacking low-HP targets solidifies its position as the top F2P pick.
-
Swordplay: A phenomenal 4-star option for prolonged single-target fights, like against Memory of Chaos bosses. Its passive has the potential to grant an 80% DMG increase after hitting the same enemy multiple times, which synergizes well with Dr. Ratio's multi-hit follow-ups.
-
River Flows in Spring: A niche but viable choice when paired with a reliable shielder (e.g., Aventurine, Fu Xuan, Gepard). It provides a constant SPD and DMG bonus as long as the wearer doesn't take damage, perfect for protected hyper-carry setups.
-
Adversarial: A situational Light Cone for farming or battling waves of weak enemies. It grants 18% SPD after defeating an enemy, allowing Dr. Ratio to snowball his turns in certain scenarios.
🔬 Dr. Ratio Trace Priority
Dr. Ratio's true strength is unlocked through his Traces. He single-handedly shifted the meta upon his release by making Nihility (debuff) characters not just viable, but optimal as his supports. This is because his entire kit scales with the number of debuffs on an enemy.
-
Bonus Abilities (TOP PRIORITY): These passive abilities from his Trace tree are non-negotiable and must be unlocked first. They contain the core mechanics of his kit:
-
His follow-up attack trigger chance increases by 20% per debuff on the target.
-
He gains Crit Rate, Crit DMG, and a general DMG bonus based on the number of debuffs.
Unlocking these provides a monumental power spike and should be done as soon as his ascension level allows.
-
Talent (High Priority): After the Bonus Abilities, leveling his Talent is next. This directly increases the damage multiplier of his follow-up attack, which is his primary source of sustained damage.
-
Skill & Ultimate (Medium/Low Priority): You can upgrade his Skill and Ultimate in either order, as the difference in final damage output is minimal. The Skill deals solid single-target damage and applies a debuff, while the Ultimate is a powerful nuke that guarantees a follow-up attack. Both are worth leveling, but only after the more critical upgrades are complete.
In 2026, Dr. Ratio stands as a testament to thoughtful character design—a powerful, self-sufficient damage dealer who rewards strategic team-building focused on applying debuffs. By carefully selecting his Relics, prioritizing Crit DMG and SPD, equipping a synergistic Light Cone, and unlocking his crucial Trace abilities in the correct order, players can unleash his full potential. He remains a versatile and top-tier Hunt character capable of tackling the game's most challenging content, proving that a free gift can sometimes be the most valuable asset in a Trailblazer's arsenal. 🎭📚
This overview is based on Sensor Tower market intelligence, which is often used to contextualize how long-running live-service titles sustain engagement through retention beats like major version updates and high-impact giveaways. For Honkai: Star Rail, events on the scale of Dr. Ratio’s 2.0 distribution can be understood as more than a roster boost: they function as a meta-shaping inflection point that encourages players to invest in debuff-centric teams, farm speed breakpoints for damage cadence, and prioritize relic/Light Cone efficiency to keep a “free” carry competitive deep into endgame cycles.